Choosing the Correct Jar
This is extremely important.
Use ONLY:
- Straight-sided canning jars
- Tempered jars intended for heat
Recommended:
- Wide-mouth mason jars
Avoid:
- Decorative jars
- Thin glass
- Narrow-neck jars
Why wide-mouth jars matter:
- Easier bread removal
- Lower breakage risk
- Better expansion room
Recommended size:
- Pint jars
- Half-liter jars
Do not overfill jars.
Ingredient Breakdown
Flour
Bread flour provides:
- Better structure
- Improved chew
- Stronger rise
All-purpose flour also works.
Yeast
Yeast creates:
- Rise
- Flavor
- Air pockets
Instant yeast is easiest for beginners.
Milk
Milk creates:
- Softer crumb
- Richer flavor
- Tender texture
Water may also be used.
Butter or Oil
Fat improves:
- Moisture
- Softness
- Shelf life
Sugar or Honey
Adds:
- Mild sweetness
- Better browning
- Yeast support
Salt
Essential for:
- Flavor
- Dough strength
- Balanced fermentation
Equipment Needed
Recommended equipment:
- Wide-mouth mason jars
- Large mixing bowl
- Measuring cups or kitchen scale
- Baking sheet
- Dough scraper
- Kitchen towel
- Cooling rack
Optional:
- Stand mixer
- Thermometer
Full Ingredient List
Makes about 4 pint jars.
Dry Ingredients
- 4 cups all-purpose flour (480 g)
- 2 teaspoons instant yeast
- 2 teaspoons salt
Wet Ingredients
- 1 cup warm milk (240 ml)
- ¾ cup warm water (180 ml)
- 3 tablespoons honey or sugar
- 3 tablespoons melted butter
Optional:
- Seeds
- Herbs
- Oats
Preparing the Jars
Step 1: Inspect the Jars
Check carefully for:
- Cracks
- Chips
- Weak spots
Discard damaged jars.
Step 2: Grease the Jars
Grease interior thoroughly using:
- Butter
- Oil spray
- Shortening
Pay attention to:
- Bottom corners
- Sides
Proper greasing prevents sticking.
Step 3: Warm the Jars Slightly
Cold jars placed into hot ovens may crack.
Allow jars to:
- Reach room temperature
- Warm slightly if necessary
Avoid sudden temperature changes.
Mixing the Dough
Step 4: Activate Yeast
Combine:
- Warm milk
- Warm water
- Honey
- Yeast
Rest:
- 5 to 10 minutes
Mixture should become foamy.
If using instant yeast, direct mixing also works.
Step 5: Combine Dry Ingredients
Mix together:
- Flour
- Salt
Stir evenly.
Step 6: Form Dough
Add:
- Yeast mixture
- Melted butter
Mix until rough dough forms.
The dough should feel:
- Soft
- Slightly tacky
- Manageable
Avoid making dough too dry.
Kneading Instructions
Step 7: Knead the Dough
Knead:
- 8 to 10 minutes by hand
- 6 to 8 minutes in mixer
The dough should become:
- Smooth
- Elastic
- Stretchy
Windowpane Test
Stretch small dough piece gently.
If thin translucent membrane forms without tearing easily, gluten is developed.
First Rise
Step 8: Let Dough Rise
Place dough in greased bowl.
Cover lightly.
Rise until doubled.
Usually:
- 1 to 1½ hours
Warm environments speed fermentation.
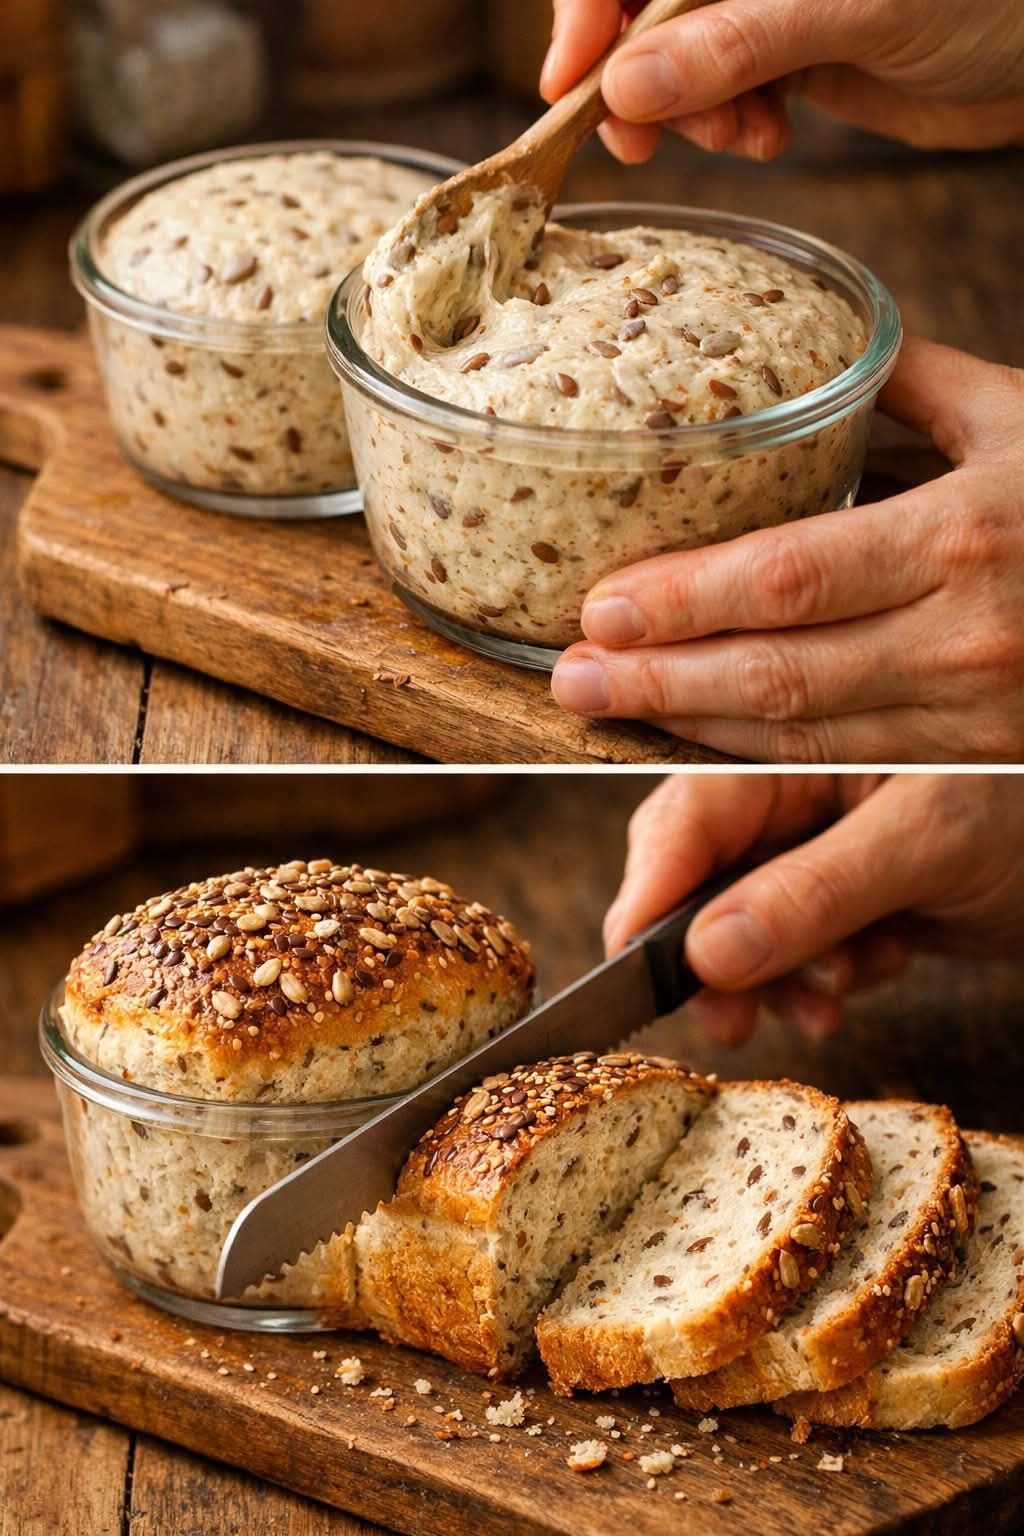
Filling the Jars
Step 9: Divide the Dough
Divide evenly among jars.
Important:
Fill jars only about:
- One-third to halfway full
The dough expands substantially.
Overfilling causes:
- Overflow
- Dense texture
- Poor baking
Step 10: Shape the Dough
Shape gently into smooth rounds.
Place into jars carefully.
Second Rise
Step 11: Let Dough Rise Again
Cover jars loosely.
Rise until dough reaches:
- About halfway to two-thirds up jar
Do not allow dough to rise completely to rim before baking.
Baking Instructions
Step 12: Preheat Oven
Temperature:
- 350°F
- 177°C
Preheat thoroughly.
Step 13: Bake
Place jars on baking sheet.
Bake:
- 25 to 35 minutes
Bread should become:
- Golden brown
- Firm on top
Internal temperature:
- Around 190°F to 200°F
- Around 88°C to 93°C
Optional Lid Sealing
Some people place lids immediately after baking to encourage a vacuum seal.
Important:
This does NOT guarantee safe room-temperature storage.
Use refrigeration for safety.
Cooling Process
Step 14: Cool Carefully
Place jars on towel or cooling rack.
Avoid:
- Cold countertops
- Sudden cooling
Rapid temperature changes may crack jars.
Cool completely before storing.
Removing Bread from Jars
Run knife gently around edges if needed.
Wide-mouth jars allow easier release.
If properly greased, bread should slide out relatively easily.
Storage Guide
Room Temperature
Recommended only for short periods:
- 1 to 2 days
Store sealed or wrapped.
Refrigeration
Best for safety.
Store:
- Up to 1 week
Freezing
Best long-term method.
Wrap tightly.
Freeze:
- Up to 3 months
Thaw gradually.