Yield
Makes approximately 4 cups (950 ml) of vanilla cream.
Enough for:
- One large cake filling
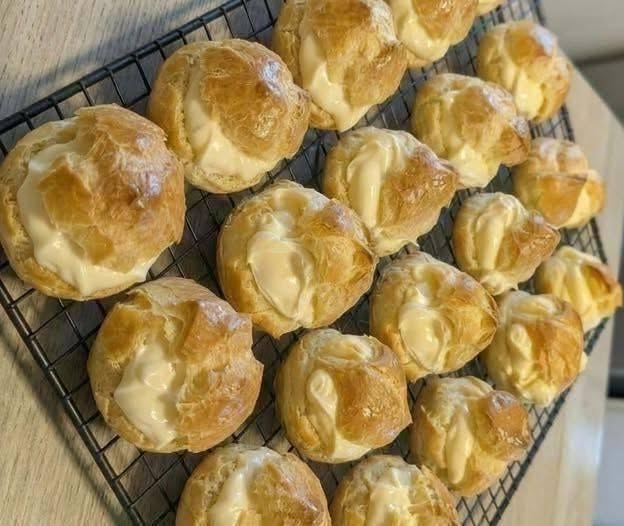
- 12 to 16 cream puffs
- 12 eclairs
- One large fruit tart
- 6 to 8 dessert servings
Ingredients
Dairy
4 cups (960 ml) whole milk
For extra richness, replace 1 cup of the milk with heavy cream.
Egg Mixture
6 large egg yolks
The yolks provide:
- Richness
- Color
- Smooth texture
- Thickening power
Sugar
3/4 cup (150 g) granulated sugar
This amount gives balanced sweetness without overpowering the vanilla flavor.
Thickener
1/2 cup (60 g) cornstarch
Cornstarch helps create:
- Stability
- Smoothness
- Proper thickness
Flavoring
2 tablespoons pure vanilla extract
For the best flavor, use high-quality pure vanilla extract.
Optional premium upgrade:
Seeds from 1 vanilla bean
Using both vanilla extract and vanilla bean creates a bakery-quality flavor.
Butter
4 tablespoons (57 g) unsalted butter
Butter adds:
- Shine
- Richness
- Smooth mouthfeel
Salt
1/4 teaspoon fine salt
Salt enhances vanilla flavor and balances sweetness.
Equipment Needed
Large saucepan
Medium mixing bowl
Whisk
Fine-mesh strainer
Heatproof spatula
Plastic wrap
Measuring cups
Measuring spoons
Kitchen scale (optional but recommended)
Understanding the Ingredients
Why Whole Milk Is Important
Whole milk contains enough fat to create a creamy texture.
Low-fat milk can produce a thinner result.
Skim milk is not recommended because it lacks richness.
Why Egg Yolks Matter
Egg yolks contain natural emulsifiers that create a smooth and luxurious texture.
The more yolks used, the richer the cream becomes.
This recipe uses six yolks for excellent richness.
Why Cornstarch Is Used
Cornstarch:
- Thickens the cream
- Prevents curdling
- Creates a smooth texture
Without cornstarch, the cream would be too thin.
Why Butter Is Added Last
Butter is added after cooking because high heat can damage its flavor.
Adding butter at the end provides:
- Silkiness
- Gloss
- Better mouthfeel
Step 1: Prepare Your Work Area
Before turning on the stove:
Measure every ingredient.
Place all ingredients within reach.
Prepare a clean bowl and fine-mesh strainer nearby.
Cut the butter into small cubes.
Having everything ready prevents mistakes during cooking.
Step 2: Heat the Milk
Pour the milk into a large saucepan.
Add:
- Half of the sugar
- Salt
If using a vanilla bean:
Split the bean lengthwise.
Scrape out the seeds.
Add both the seeds and pod to the milk.
Place over medium heat.
Stir occasionally.
Heat until the milk is steaming and tiny bubbles appear around the edges.
Do not boil aggressively.
Ideal temperature:
About 180°F to 190°F (82°C to 88°C).
Remove from heat.
Allow the vanilla bean to steep for 10 minutes if using.
Remove the pod afterward.
Step 3: Prepare the Egg Mixture
In a medium bowl combine:
- Egg yolks
- Remaining sugar
Whisk for approximately 1 minute.
The mixture should become lighter in color.
Add cornstarch.
Whisk until completely smooth.
No lumps should remain.
The mixture should resemble a thick pale-yellow paste.
Step 4: Temper the Eggs
Tempering prevents scrambled eggs.
Very slowly pour about one cup of the hot milk into the egg mixture.
Whisk continuously while pouring.
Continue whisking until fully incorporated.
Add another cup of hot milk.
Whisk again.
The egg mixture should now be warm and fluid.
Step 5: Combine Everything
Pour the tempered egg mixture back into the saucepan containing the remaining milk.
Whisk immediately.
Place the pan over medium heat.
Begin cooking.
Step 6: Cook the Vanilla Cream
This is the most important stage.
Whisk constantly.
Pay special attention to the corners and bottom of the pan.
After a few minutes, the mixture will begin thickening.
You may notice:
- Small bubbles
- Increased resistance while whisking
- A glossy appearance
Continue whisking.
Do not stop.
The cream will suddenly become much thicker.
Keep cooking for another 1 to 2 minutes after thickening.
This ensures the cornstarch is fully cooked.
Properly cooked vanilla cream should:
- Hold soft peaks
- Coat the whisk heavily
- Look smooth and glossy
Step 7: Strain for Perfect Smoothness
Place a fine-mesh strainer over a clean bowl.
Pour the hot cream through the strainer.
Use a spatula to help push it through.
This step removes:
- Tiny lumps
- Egg fragments
- Any remaining vanilla bean fibers
Professional pastry chefs rarely skip this step.
Step 8: Add Butter and Vanilla
While the cream is still hot:
Add butter cubes.
Stir until completely melted.
Add vanilla extract.
Mix thoroughly.
The cream should become:
- Shinier
- Richer
- More aromatic
Step 9: Cool Properly
Transfer the cream to a shallow container.
Spread evenly.
Place plastic wrap directly against the surface.
This prevents a skin from forming.
Allow to cool at room temperature for 20 to 30 minutes.
Transfer to the refrigerator.
Chill for at least 4 hours.
Overnight chilling gives the best texture.
Step 10: Final Mixing Before Use
After chilling, the cream may seem very firm.
This is normal.
Whisk gently until smooth.
The cream should become:
- Silky
- Spreadable
- Velvety
Do not overwhisk.
Excessive whisking can loosen the structure.
Optional Extra-Rich Version
For an even more luxurious vanilla cream:
Ingredients to add:
1 additional egg yolk
1/2 cup (120 ml) heavy cream
1 extra tablespoon butter
This version is especially good for:
- Wedding cakes
- Pastry fillings
- Special occasion desserts
Light and Airy Vanilla Cream
To create a lighter mousse-like texture:
Prepare and chill the vanilla cream completely.
Whip:
1 cup (240 ml) cold heavy cream
to medium peaks.
Fold the whipped cream into the chilled vanilla cream.
Result:
- Lighter texture
- Airier mouthfeel
- Perfect for layered desserts
Chocolate Vanilla Cream Variation
Reduce milk by 1/2 cup.
Add:
170 g (6 oz) finely chopped dark chocolate
Add chocolate immediately after cooking.
Stir until melted.
Then add butter and vanilla.
Coffee Vanilla Cream Variation
Dissolve:
2 tablespoons instant espresso powder
into the hot milk before cooking.
Produces a rich coffee-vanilla flavor.
Honey Vanilla Cream Variation
Replace:
1/4 cup sugar
with
1/4 cup honey.
The cream will have a delicate floral sweetness.
Fruit Vanilla Cream Variation
After chilling:
Fold in:
- Strawberry puree
- Mango puree
- Peach puree
- Raspberry puree
Use approximately 1/2 cup puree per 2 cups cream.
Common Mistakes and How to Avoid Them
Cream Is Lumpy
Possible causes:
- Insufficient whisking
- Uneven heating
- Eggs partially cooked
Solution:
Strain immediately.
Blend briefly with an immersion blender if needed.
Cream Is Too Thin
Possible causes:
- Not cooked long enough
- Incorrect measurements
- Too much liquid
Solution:
Return to heat and cook longer.
Cream Is Too Thick
Possible causes:
- Overcooking
- Excess cornstarch
Solution:
Whisk in a small amount of cold milk until desired consistency is reached.
Cream Tastes Starchy
Cause:
Cornstarch not fully cooked.
Solution:
Cook for 1 to 2 minutes after thickening.
Skin Forms on Top
Cause:
Surface exposed to air.
Solution:
Place plastic wrap directly on the surface.
Storage Instructions
Refrigerator:
Up to 4 days in an airtight container.
Keep covered at all times.
Freezing
Freezing is generally not recommended.
The texture may become grainy after thawing.
Fresh vanilla cream always provides the best results.
Serving Ideas
Use this vanilla cream in:
- Layer cakes
- Cupcakes
- Cream puffs
- Eclairs
- Donuts
- Danish pastries
- Fruit tarts
- Trifles
- Parfaits
- Napoleons
- Mille-feuille
- Dessert cups
- Pancake fillings
- Crepe fillings
- Waffle toppings
It can also be served on its own with fresh berries, toasted nuts, shaved chocolate, caramel sauce, or a sprinkle of cinnamon.
Professional Baker’s Tips
- Use real vanilla extract rather than imitation vanilla.
- Weigh ingredients whenever possible for accuracy.
- Strain the cream for the smoothest result.
- Chill thoroughly before using.
- Use whole milk or a milk-and-cream combination.
- Cook gently but thoroughly.
- Whisk constantly during thickening.
- Add butter while the cream is hot.
- Store with plastic wrap touching the surface.
- Allow flavors to develop overnight for the deepest vanilla taste.
When prepared carefully, this vanilla cream develops a rich vanilla aroma, a glossy appearance, and an exceptionally smooth texture that rivals the fillings used in professional pastry kitchens.