Preparation Time
- Preparation Time: 40 minutes
- Baking Time: 1 hour 15 minutes
- Cooling Time: 6–8 hours
- Total Time: Approximately 9 hours including chilling
Equipment Needed
Before starting, prepare the following equipment:
- 9-inch springform pan
- Mixing bowls
- Electric hand mixer or stand mixer
- Saucepan
- Spatula
- Measuring cups and spoons
- Baking tray
- Aluminum foil
- Fine strainer (optional)
- Cooling rack
Ingredients
For the Biscuit Crust
- 2 cups digestive biscuits or graham cracker crumbs
- 1/2 cup melted unsalted butter
- 2 tablespoons sugar
- 1 pinch salt
For the Cheesecake Filling
- 900 grams cream cheese, softened at room temperature
- 1 cup white sugar
- 1 cup sour cream
- 1/2 cup heavy cream
- 4 large eggs
- 1 tablespoon vanilla extract
- 2 tablespoons corn starch
- 1 tablespoon lemon juice
- 1 teaspoon lemon zest
- 1 small pinch salt
For the Blueberry Sauce Topping
- 3 cups fresh or frozen blueberries
- 1/2 cup sugar
- 2 tablespoons lemon juice
- 1/4 cup water
- 1 tablespoon corn starch
- 2 tablespoons cold water for mixing with corn starch
- 1 teaspoon vanilla extract
Important Tips Before You Start
1. Bring Ingredients to Room Temperature
Cold cream cheese creates lumps. Leave the cream cheese, eggs, sour cream, and cream outside the refrigerator for about 45–60 minutes before mixing.
2. Do Not Overmix
Too much air inside the batter can cause cracks while baking. Mix gently and slowly after adding eggs.
3. Use a Water Bath
A water bath creates steam and helps the cheesecake bake evenly while staying creamy.
4. Chill Properly
Cheesecake tastes best after chilling overnight. Patience gives the best texture.
Step-by-Step Instructions
Part 1: Preparing the Crust
Step 1: Crush the Biscuits
Place digestive biscuits or graham crackers into a food processor and blend until they become fine crumbs.
If you do not have a food processor, place the biscuits inside a zip bag and crush them with a rolling pin.
The crumbs should look like sand with no large pieces remaining.
Step 2: Mix the Crust Ingredients
Transfer the crumbs into a mixing bowl.
Add:
- Melted butter
- Sugar
- Pinch of salt
Mix thoroughly until every crumb becomes coated with butter.
When pressed between your fingers, the mixture should hold together.
Step 3: Prepare the Pan
Grease the bottom and sides of a 9-inch springform pan lightly with butter.
Pour the crumb mixture into the pan.
Use the back of a spoon or flat-bottom glass to press the crumbs firmly into the bottom.
You may also press some crumbs slightly up the sides if desired.
Step 4: Bake the Crust
Preheat your oven to 160°C (320°F).
Bake the crust for 10 minutes.
Remove from oven and let it cool while preparing the filling.
Part 2: Preparing the Cheesecake Filling
Step 1: Beat the Cream Cheese
Place softened cream cheese into a large mixing bowl.
Beat on low-medium speed until completely smooth and creamy.
This may take around 3–4 minutes.
Scrape the bowl occasionally so no lumps remain.
Step 2: Add Sugar
Add sugar gradually while mixing slowly.
Continue beating until the mixture looks silky and smooth.
Do not rush this step.
Step 3: Add Sour Cream and Heavy Cream
Add:
- Sour cream
- Heavy cream
Mix slowly until fully combined.
The batter will become softer and creamier.
Step 4: Add Vanilla, Lemon Juice, and Lemon Zest
Add:
- Vanilla extract
- Lemon juice
- Lemon zest
- Salt
Mix gently.
The lemon enhances freshness without making the cheesecake taste sour.
Step 5: Add Corn Starch
Sprinkle corn starch evenly into the batter.
Mix until fully dissolved.
Corn starch helps stabilize the cheesecake and reduces cracking.
Step 6: Add Eggs Carefully
Add eggs one at a time.
Mix on low speed after each egg only until combined.
Avoid overbeating.
The final batter should be smooth, creamy, and thick.
Part 3: Assembling the Cheesecake
Step 1: Wrap the Pan
Wrap the outside of the springform pan with aluminum foil.
This prevents water from leaking into the crust during the water bath.
Wrap at least two layers for safety.
Step 2: Pour the Filling
Pour the cheesecake batter over the cooled crust.
Use a spatula to spread evenly.
Tap the pan gently on the counter to release trapped air bubbles.
Part 4: Baking the Cheesecake
Step 1: Prepare the Water Bath
Place the cheesecake pan inside a larger baking tray.
Carefully pour hot water into the tray until it reaches halfway up the sides of the cheesecake pan.
Step 2: Bake Slowly
Bake at 160°C (320°F) for approximately 70–75 minutes.
The center should still jiggle slightly when gently shaken.
Do not wait until the middle becomes completely firm.
Step 3: Cool Slowly
Turn off the oven.
Open the oven door slightly and leave the cheesecake inside for 1 hour.
This gradual cooling helps prevent cracks.
Step 4: Refrigerate
Remove the cheesecake from oven.
Let it cool completely at room temperature.
Cover and refrigerate for at least 6 hours, preferably overnight.
The texture becomes much richer after chilling.
Part 5: Making the Blueberry Topping
Step 1: Cook the Blueberries
Add to a saucepan:
- Blueberries
- Sugar
- Lemon juice
- Water
Cook on medium heat for 5–7 minutes.
The berries will begin releasing juice.
Step 2: Thicken the Sauce
Mix corn starch with 2 tablespoons cold water separately.
Pour this mixture slowly into the blueberry sauce while stirring continuously.
Cook for another 2–3 minutes until thickened.
Step 3: Finish the Sauce
Add vanilla extract.
Turn off heat and allow the sauce to cool completely.
The sauce thickens more as it cools.
Part 6: Decorating the Cheesecake
Remove chilled cheesecake from refrigerator.
Carefully remove the springform ring.
Spoon the blueberry topping over the cheesecake.
Spread gently across the surface.
Allow some blueberries to naturally fall toward the edges for a beautiful homemade appearance.
How to Slice Cheesecake Perfectly
For clean slices:
- Use a sharp knife.
- Dip the knife in hot water.
- Wipe clean after every cut.
This creates bakery-style slices.
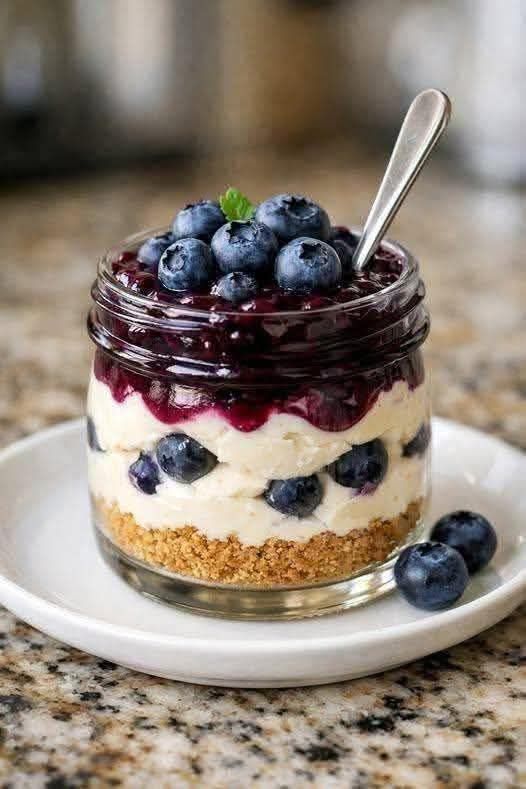
Texture and Flavor Description
This cheesecake has:
- A buttery crunchy base
- Extremely creamy filling
- Balanced sweetness
- Light vanilla aroma
- Fresh blueberry flavor
- Slight lemon brightness
- Smooth melt-in-mouth texture
The blueberry topping adds freshness and a glossy finish that contrasts beautifully with the creamy center.
Common Mistakes and Solutions
Cheesecake Cracked on Top
Possible reasons:
- Overmixing eggs
- Baking too long
- Cooling too quickly
Solution:
Use low mixing speed and cool gradually.
Lumpy Batter
Reason:
Cream cheese was too cold.
Solution:
Always soften ingredients before mixing.
Soggy Crust
Reason:
Water leaked into the pan.
Solution:
Wrap foil tightly around the springform pan.
Cheesecake Too Soft
Reason:
Insufficient chilling time.
Solution:
Refrigerate overnight.
Delicious Variations
Lemon Blueberry Cheesecake
Add extra lemon zest and lemon curd topping.
White Chocolate Blueberry Cheesecake
Melt 200 grams white chocolate and mix into the batter.
No-Bake Version
Skip eggs and use gelatin for setting.
Mixed Berry Cheesecake
Combine blueberries with raspberries and strawberries.
Storage Instructions
Refrigerator
Store covered in refrigerator for up to 5 days.
Freezer
Wrap slices tightly and freeze up to 2 months.
Thaw overnight in refrigerator before serving.
Serving Suggestions
Serve chilled with:
- Fresh blueberries
- Whipped cream
- Vanilla ice cream
- Hot coffee
- Tea
Final Notes
A perfect cheesecake is all about patience and gentle baking. Do not rush the chilling process because that is where the texture fully develops. The combination of creamy cheesecake and homemade blueberry topping creates a dessert that feels elegant, comforting, and bakery-quality at the same time.
This recipe is ideal for:
- Birthdays
- Family dinners
- Celebrations
- Tea parties
- Weekend baking
- Holiday desserts
Once you master this recipe, you can easily adapt it into many different cheesecake flavors.