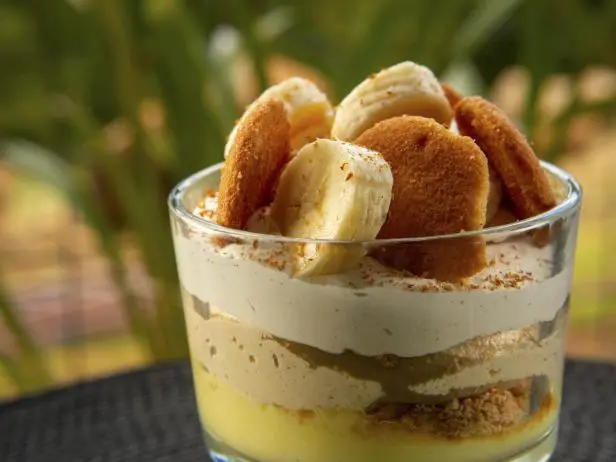
A Creamy Homemade Banana Dessert Made with Simple Ingredients
Some desserts are all about heavy sweetness, but this homemade banana pudding takes a different approach. Instead of relying on sugar, this recipe uses naturally ripe bananas to create a gentle sweetness, along with a smooth custard base made from milk, egg yolks, and simple pantry ingredients.
The result is a creamy, comforting dessert with a soft texture and a fresh banana flavor. It is lighter in sweetness than traditional pudding recipes, making it a great option for anyone who enjoys desserts where the natural flavor of the ingredients can shine.
This pudding is made by preparing a smooth banana custard, layering it with fresh banana slices, and allowing everything to chill until the flavors blend together. The waiting time is important because the pudding becomes thicker, creamier, and more flavorful after resting in the refrigerator.
The recipe uses basic ingredients that are easy to find, but each one has an important role. The milk creates a creamy foundation, egg yolks add richness, cornstarch and flour help thicken the pudding, and ripe bananas provide both flavor and natural sweetness.
Why This Banana Pudding Works So Well
A good pudding depends on texture, balance, and patience. This recipe focuses on creating a smooth and creamy consistency without adding extra sugar.
The sweetness comes entirely from ripe bananas. The best bananas for this recipe are yellow bananas with brown spots because they contain more natural sweetness and have a stronger banana flavor.
The custard base is gently cooked until thick and smooth. Using a combination of cornstarch and all-purpose flour creates a pudding that holds its shape while remaining soft and creamy.
Another important step is slowly combining the warm milk with the egg mixture. This process helps the eggs blend smoothly into the pudding without becoming scrambled.
The final dessert has a mild sweetness, creamy texture, and comforting homemade taste.
Ingredients Overview
Whole Milk
Whole milk provides the creamy texture that makes this pudding rich and smooth. While other types of milk can be used, whole milk gives the best consistency because of its higher fat content.
The milk should be warmed gently before combining it with the egg mixture. Heating it slowly helps create a silky custard.
Egg Yolks
Three large egg yolks add richness and help create a smooth custard texture.
Only the yolks are used in this recipe. The leftover egg whites can be saved and used for another recipe.
When mixed properly with the thickening ingredients, the egg yolks help give the pudding its classic custard-like texture.
Cornstarch and Flour
Cornstarch is the main thickening ingredient, while a small amount of all-purpose flour adds structure.
Combining these ingredients before adding the liquid helps prevent lumps and creates a smoother pudding.
The goal is a pudding that is thick enough to layer but still soft and creamy when served.
Vanilla Extract and Salt
Vanilla extract enhances the banana flavor and adds warmth to the dessert.
A small amount of salt balances the natural sweetness of the bananas and helps bring out the flavors of the other ingredients.
Even though the recipe does not contain added sugar, these small additions make the pudding taste more complete.
Choosing the Best Bananas
The bananas are the star ingredient in this recipe, so choosing the right ones makes a big difference.
Very ripe bananas work best because they are naturally sweeter and easier to mash. Look for bananas that are yellow with brown spots on the peel.
Avoid using green or firm bananas because they will not provide the same sweetness or strong banana flavor.
Some of the bananas are mashed into the pudding mixture, while others are sliced and used between the layers. This creates a combination of smooth banana flavor and fresh fruit texture.
Optional Additions Without Added Sugar
The pudding is delicious on its own, but a few optional additions can add extra texture.
These toppings are not required, but they can be used depending on personal preference:
- Plain unsweetened whipped cream
- Plain unsweetened Greek yogurt
- Crushed unsweetened vanilla-free biscuits
- Soft oat biscuits with no added sugar
The key is choosing unsweetened options so the natural banana flavor remains the main focus.
Preparing the Bananas
Before starting the custard, prepare the bananas.
Peel all of the bananas and slice them into even rounds. Keeping the slices similar in size helps create neat layers later.
Set aside two bananas for layering.
Place the remaining bananas in a bowl and mash them thoroughly with a fork until they become smooth. The mashed bananas will be mixed into the cooked pudding and provide natural sweetness throughout the dessert.
Taking time to mash the bananas well helps create a smoother final texture.
Preparing the Custard Base
The smooth texture of the pudding starts with properly combining the dry ingredients.
In a mixing bowl, combine:
- Cornstarch
- All-purpose flour
- Salt
Whisk these ingredients together until evenly mixed.
This simple step helps distribute the thickeners properly and reduces the chance of lumps forming during cooking.
Next, add the egg yolks to the dry mixture. Whisk gently until the mixture becomes smooth, creamy, and pale yellow.
The egg mixture should be well combined before adding the warm milk.
Creating the Smooth Banana Custard
Warming the Milk
Once the egg mixture is ready, the next step is gently warming the milk.
Pour the whole milk into a medium saucepan and place it over medium heat. The goal is to warm the milk slowly without bringing it to a boil.
The milk should become warm enough to release steam, but there should not be bubbles forming around the edges. Gentle heating keeps the texture smooth and makes it easier to combine with the eggs.
Heating the milk properly is an important part of creating a creamy pudding because sudden high heat can affect the final texture.
Tempering the Egg Mixture
Before adding the egg mixture directly to the saucepan, it needs to be gradually warmed.
Slowly add about half a cup of the warm milk into the bowl with the egg yolk mixture. While adding the milk, whisk continuously.
This step is called tempering. It allows the eggs to slowly adjust to the warmer temperature instead of cooking too quickly.
Once the mixture becomes thinner, smoother, and warmed through, it is ready to be added to the saucepan.
This small step makes a big difference in achieving a silky pudding texture.
Cooking the Banana Pudding
Pour the tempered egg mixture into the saucepan with the remaining warm milk.
Add the mashed bananas and stir everything together.
Place the saucepan over medium-low heat and begin cooking the pudding slowly. Use a whisk or rubber spatula to stir constantly.
Keeping the heat lower and stirring regularly helps the custard cook evenly. Avoid leaving the mixture unattended because the thickening process happens gradually, and the bottom can stick if it is not stirred.
After several minutes, the pudding will begin to change:
- The mixture will become thicker
- The texture will become smooth and glossy
- It will begin coating the back of a spoon
The finished pudding should be creamy and thick enough to hold layers while still remaining soft.
Patience is important during this stage. Cooking too quickly can affect the smooth consistency.
Adding the Final Flavors
Once the pudding reaches the desired thickness, remove the saucepan from the heat.
Add the pure vanilla extract and stir well to combine.
Taste the pudding if desired. The flavor should be naturally sweet from the bananas, creamy from the milk, and balanced with the vanilla and salt.
Because this recipe does not use added sugar, the ripeness of the bananas plays an important role in the final flavor.
Making the Pudding Extra Smooth
For an especially smooth texture, the pudding can be strained before assembling.
Place a fine strainer over a bowl and carefully pour the cooked pudding through it.
Use a spoon to gently press the pudding through the strainer.
This optional step removes any small banana fibers or tiny bits of cooked egg, leaving behind a smoother custard.
While straining is not required, it creates a more refined pudding texture.
Layering the Banana Pudding
Once the custard is ready, it is time to assemble the dessert.
Choose a serving dish or individual cups depending on how you want to present it.
Begin with a thin layer of banana pudding at the bottom. Add a layer of sliced bananas on top.
Continue alternating layers of pudding and banana slices until all ingredients are used.
Finish with a layer of pudding on top.
When layering, press gently to remove any large air pockets. This helps the dessert settle evenly and gives each serving a smooth appearance.
Individual cups work well for serving because each portion is already prepared, while a larger dish creates a classic family-style dessert.
Chilling the Dessert
Proper chilling is one of the most important steps in this recipe.
Cover the surface of the pudding directly with plastic wrap or parchment paper. Placing the covering directly on the pudding prevents a skin from forming on top.
Refrigerate the banana pudding for at least four hours.
For the best texture and flavor, chilling overnight is recommended.
During this resting time:
- The custard becomes firmer
- The banana flavor develops
- The layers blend together
- The texture becomes smoother and more satisfying
Although it may be tempting to serve the pudding immediately, allowing it to chill properly creates the best result.
Serving Suggestions
Before serving, remove the pudding from the refrigerator and add any optional toppings if desired.
Some simple options include:
- Unsweetened whipped cream for a light creamy finish
- Plain unsweetened Greek yogurt for extra richness
- Additional banana slices for decoration
If using biscuits, choose options without added sugar to keep the recipe aligned with its naturally sweetened style.
This banana pudding works well as a family dessert, a make-ahead treat, or a simple sweet dish for special occasions.
Texture and Flavor Tips
The final texture and sweetness of this pudding depend mainly on the bananas and cooking process.
Use Very Ripe Bananas
Bananas with brown spots provide the strongest flavor and natural sweetness. Less ripe bananas may result in a pudding that tastes less sweet.
Cook Slowly
Low and steady heat helps create a smooth custard. Rushing the cooking process can lead to uneven texture.
Chill Completely
The pudding needs enough time in the refrigerator to set properly. The longer chilling time improves both texture and flavor.
Keep Expectations Balanced
This pudding has a gentle natural sweetness rather than the intense sweetness of traditional sugar-filled desserts. The flavor is creamy, comforting, and banana-forward.
Storage Information
Store leftover banana pudding covered in the refrigerator.
For the best quality, enjoy it within a few days. The bananas may soften over time, but the flavor will continue to develop.
Keep any optional toppings separate and add them just before serving for the freshest texture.
In a mixing bowl, combine cornstarch, all-purpose flour, and salt. Whisk until evenly mixed.
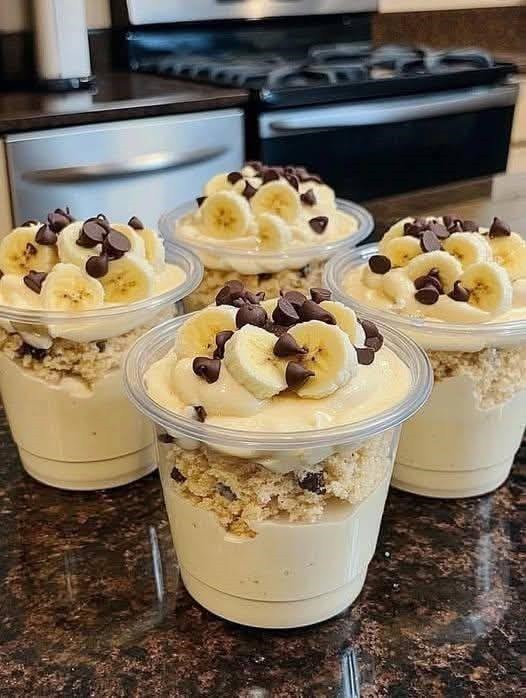
Banana pudding (sugar free)
This homemade banana pudding is a creamy, naturally sweet dessert made with ripe bananas, whole milk, egg yolks, and a simple custard base. The sweetness comes from very ripe bananas instead of added sugar, creating a smooth and comforting pudding with layers of fresh banana slices. It is a simple make-ahead dessert that becomes even better after chilling.
20
minutes20
minutes176
kcal40
minutesIngredients
2 cup whole milk
3 large egg yolks
3 tablespoon cornstarch
1 tablespoon All-purpose flour
1 teaspoon Pure vanilla extract
1/4 teaspoon Salt
5 divided ripe bananas
3 mashed banana
2 layering banana for layering
Directions
- Peel all bananas and slice them into even rounds about ½ centimeter thick.
- Set aside some banana slices for layering. Place the remaining bananas in a bowl and mash them thoroughly until smooth.
- In a mixing bowl, combine cornstarch, all-purpose flour, and salt. Whisk until evenly mixed
- Add the egg yolks to the dry ingredients and whisk until the mixture becomes smooth and creamy
- Pour the whole milk into a medium saucepan and warm it over medium heat. Heat gently until steaming but not boiling.
- Slowly add about ½ cup of the warm milk into the egg mixture while whisking constantly. This helps warm the eggs gradually.
- Pour the tempered egg mixture back into the saucepan with the remaining milk
- Add the mashed bananas and cook over medium-low heat, stirring constantly with a whisk or spatula
- Continue cooking until the pudding thickens, becomes glossy, and coats the back of a spoon.
- Remove from heat and stir in the vanilla extract
- For an extra smooth pudding, strain the mixture through a fine strainer if desired.
- Assemble the pudding by adding a layer of custard, followed by sliced bananas. Continue layering until all ingredients are used, finishing with pudding on top.
- Cover the surface directly with plastic wrap or parchment paper to prevent a skin from forming.
- Refrigerate for at least 4 hours. For the best flavor and texture, chill overnight
Notes
- Use very ripe bananas with brown spots for the best natural sweetness and banana flavor.
- Whole milk provides the creamiest texture, but other milk options can be used if needed.
- Stir the pudding constantly while cooking to prevent lumps and ensure a smooth consistency
- Do not boil the milk or custard mixture; gentle cooking creates the best texture.
- Tempering the egg yolks prevents them from scrambling.
- Chilling time is important because it allows the pudding to set and the flavors to develop
- Optional toppings should be unsweetened to keep the recipe naturally sweetened
- Store leftover pudding covered in the refrigerator.