Equipment Needed
- Mixing bowls (small, medium, large)
- Electric mixer or stand mixer
- Rolling pin
- Baking trays
- Parchment paper
- Fine mesh sieve
- Saucepan (small)
- Heatproof bowl
- Whisk and spatula
- Cooling rack
- Offset spatula or butter knife
- Forks for chocolate dipping
Ingredient List
Chocolate Biscuit Cookies
- 2 cups (260 g) all-purpose flour
- ½ cup (50 g) Dutch-processed cocoa powder
- ½ teaspoon baking powder
- ¼ teaspoon baking soda
- ½ teaspoon fine salt
- ¾ cup (170 g) unsalted butter, softened
- ¾ cup (150 g) granulated sugar
- ¼ cup (50 g) brown sugar
- 1 large egg, room temperature
- 1 teaspoon vanilla extract
- 2 tablespoons milk
Chocolate Cream Filling
- ½ cup (115 g) unsalted butter, softened
- 1½ cups (180 g) powdered sugar, sifted
- ¼ cup (25 g) cocoa powder, sifted
- 1 teaspoon vanilla extract
- 2–3 tablespoons milk or cream
- Pinch of salt
Chocolate Coating
- 10 oz (280 g) dark chocolate (45–60% cocoa), chopped
- 2 tablespoons neutral oil or cocoa butter
Step 1: Prepare the Biscuit Dough
- In a medium bowl, sift together the flour, cocoa powder, baking powder, baking soda, and salt.
Set aside. - In a large mixing bowl, beat the softened butter with both sugars until pale, fluffy, and smooth.
This should take about 2–3 minutes with an electric mixer. - Add the egg and vanilla extract.
Beat until fully incorporated, scraping down the sides of the bowl. - Add the dry ingredients in two additions, mixing on low speed.
Add the milk during the final mixing stage. - Mix until a soft but firm dough forms.
The dough should not be sticky. If it is, refrigerate for 15 minutes.
Step 2: Roll and Cut the Biscuits
- Divide the dough into two portions.
Flatten each into a disc and wrap in parchment paper. - Chill the dough for 30 minutes.
This improves flavor and makes rolling easier. - Preheat the oven to 350°F (175°C).
- Roll one dough disc between two sheets of parchment paper to about ¼ inch (6 mm) thickness.
- Cut into rectangles or squares approximately 2 x 1½ inches.
Try to keep sizes uniform for neat sandwiching. - Place cookies on a lined baking tray, spacing slightly apart.
Step 3: Bake the Biscuits
- Bake for 10–12 minutes.
The biscuits should look set but not dry. - Remove from the oven and allow to cool on the tray for 5 minutes.
- Transfer to a cooling rack and let cool completely before filling.
Step 4: Prepare the Chocolate Cream Filling
- Beat the softened butter until smooth and creamy.
- Add powdered sugar and cocoa powder gradually, mixing slowly.
- Add vanilla extract, salt, and milk one tablespoon at a time.
- Beat until the filling is smooth, fluffy, and spreadable but not runny.
- Cover and set aside at room temperature.
Step 5: Assemble the Sandwich Biscuits
- Pair biscuits of similar size.
- Spread or pipe a generous layer of chocolate cream filling onto the flat side of one biscuit.
- Top with another biscuit, gently pressing to spread the filling evenly.
- Place assembled biscuits on a tray and refrigerate for 30 minutes to firm up.
Step 6: Prepare the Chocolate Coating
- Place chopped chocolate and oil in a heatproof bowl.
- Melt gently over a saucepan of simmering water or in short microwave intervals.
- Stir until smooth and glossy.
Do not overheat. - Let the chocolate cool slightly but remain fluid.
Step 7: Coat the Biscuits
- Using a fork, dip each chilled biscuit into the melted chocolate.
- Turn to coat fully, then lift and tap gently to remove excess.
- Place on parchment paper to set.
- Repeat until all biscuits are coated.
- Allow to set at room temperature or refrigerate for faster results.
Step 8: Final Setting and Storage
- Let biscuits fully set for at least 1 hour before serving.
- Store in an airtight container:
- Room temperature: up to 4 days
- Refrigerated: up to 10 days
- Flavor improves after 24 hours.
Tips for Best Results
- Use Dutch-processed cocoa for deeper chocolate flavor.
- Chilling between stages improves structure and appearance.
- Tempering chocolate gives the best snap, but oil works well for home baking.
- For extra authenticity, keep biscuits thin and filling modest.
Optional Variations
- Add peppermint extract to the filling for a mint version.
- Use milk chocolate for a sweeter coating.
- Add espresso powder to the biscuit dough for intensified chocolate flavor.
If you want, I can also provide:
- A vegan version
- A gluten-free version
- A shortened bakery-style method
- Or a professional tempering chocolate guide
Just tell me.
bacon sandwich
Below is a clear, long, and readable homemade bacon sandwich guide, written simply and without icons.
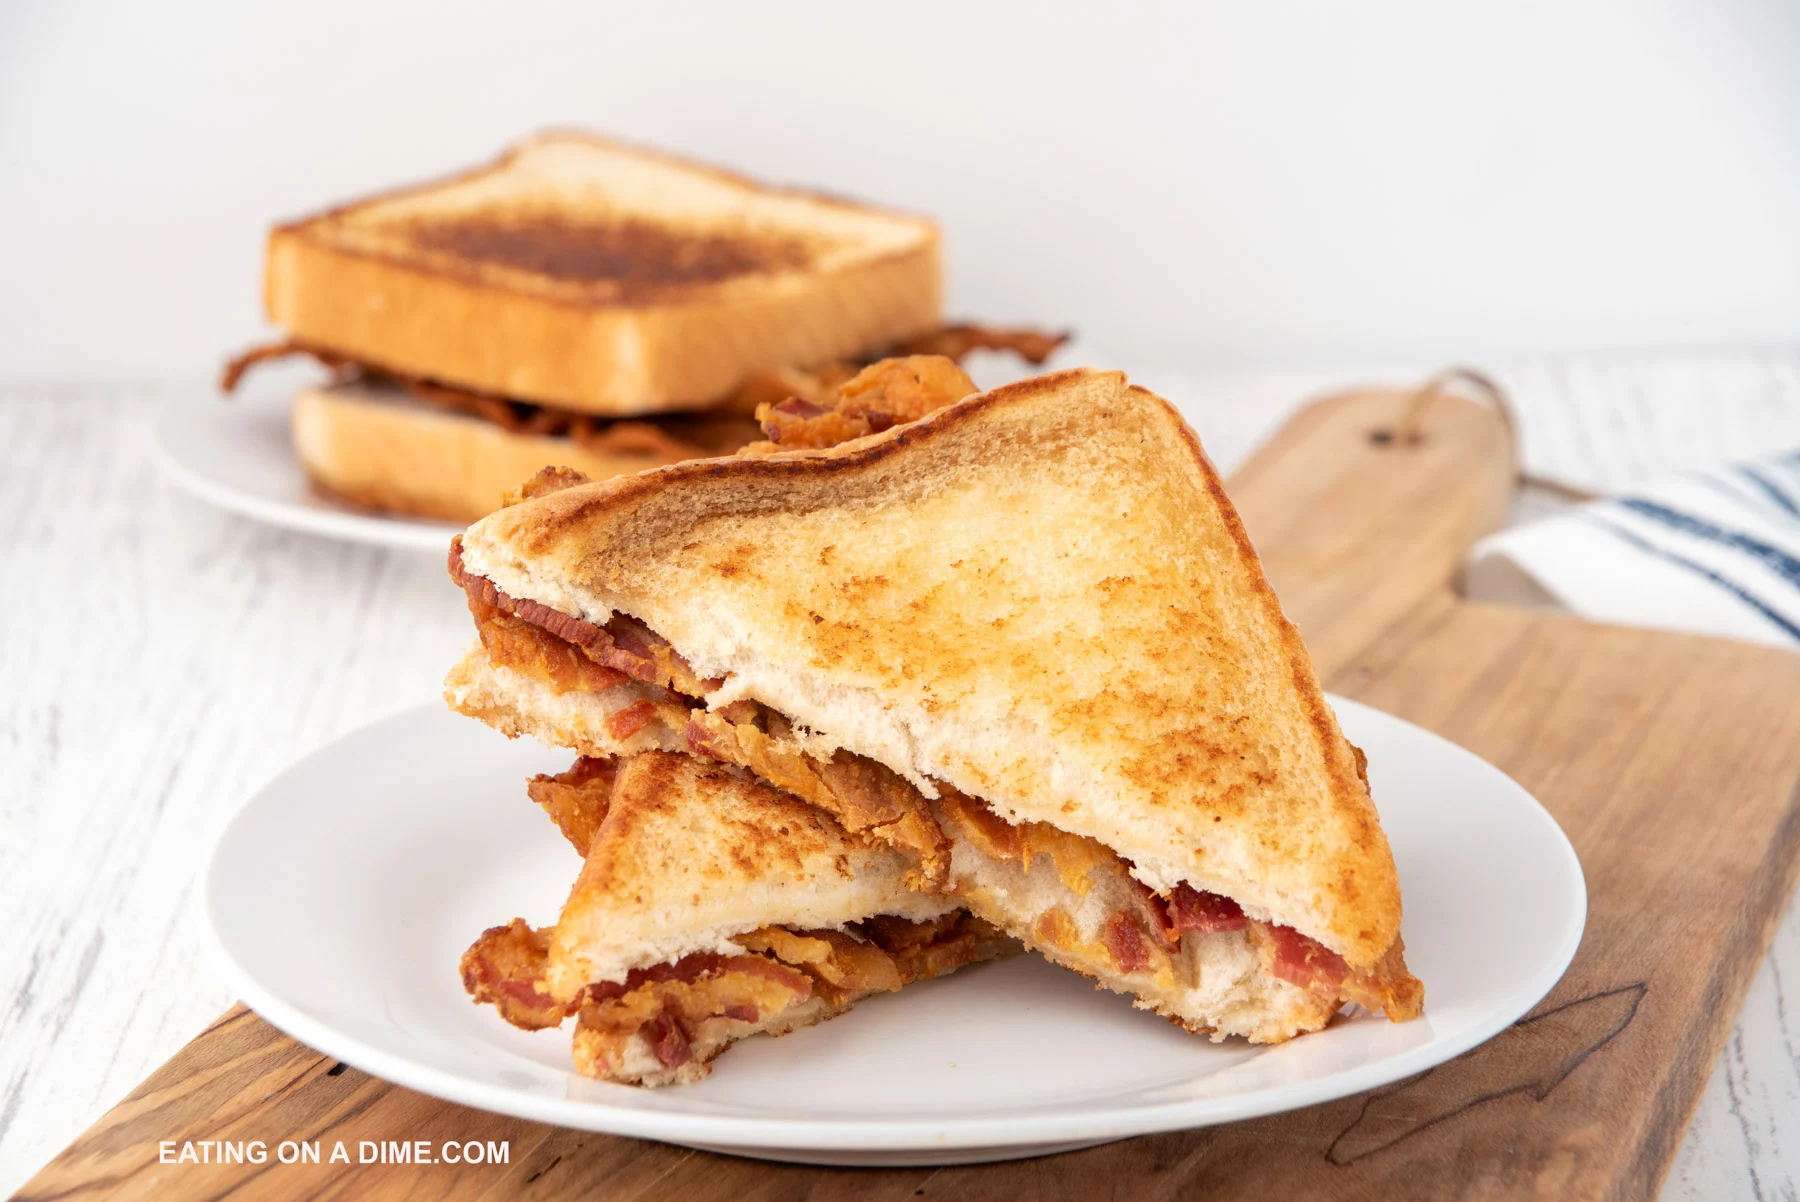
Classic Bacon Sandwich
Overview
A bacon sandwich is a simple but deeply satisfying meal built around crisp, salty bacon and good bread. The key is balance: properly cooked bacon, warm bread, and minimal additions that enhance rather than overpower the flavor.
Serves: 1
Total Time: 15–20 minutes
Difficulty: Easy
Ingredients
- 2–3 slices of good-quality bread
White sandwich bread, sourdough, or thick-cut farmhouse bread all work well. - 4–6 slices bacon
Streaky bacon is traditional, but back bacon can also be used. - Butter, softened
Optional but recommended. - Optional additions (choose sparingly):
- Ketchup or brown sauce
- Mayonnaise
- Fried or scrambled egg
- Lettuce or tomato
- Black pepper
Step 1: Cook the Bacon
Pan Method (Traditional)
- Place the bacon in a cold frying pan in a single layer.
- Set the heat to medium.
- Cook slowly, turning occasionally, until the fat renders and the bacon becomes golden and crisp.
- Transfer to paper towels to drain excess fat.
Oven Method (Hands-Off)
- Preheat the oven to 400°F (200°C).
- Line a baking tray with parchment paper.
- Lay bacon flat without overlapping.
- Bake for 15–20 minutes, turning once, until crisp.
- Drain briefly on paper towels.
Step 2: Prepare the Bread
- Lightly toast the bread until warm and just golden.
The bread should remain soft inside. - Butter one or both slices while still warm.
Butter acts as a moisture barrier and adds richness.
Step 3: Assemble the Sandwich
- Place the hot bacon evenly on one slice of bread.
- Add any optional sauces sparingly.
- Season lightly with black pepper if desired.
- Top with the second slice of bread.
- Press gently to bring everything together.
Step 4: Serve
- Cut in half if desired.
- Serve immediately while the bacon is hot and crisp.
Popular Variations
Bacon and Egg Sandwich
Add a fried egg with a runny yolk for extra richness.
BLT-Style Bacon Sandwich
Add lettuce and tomato for freshness and contrast.
Bacon and Cheese Sandwich
Add a slice of cheddar or American cheese while the bacon is still hot so it softens slightly.
British-Style Bacon Sandwich
Use back bacon, white bread, butter, and brown sauce or ketchup.
Tips for the Best Bacon Sandwich
- Do not overcrowd the pan when cooking bacon.
- Choose bread sturdy enough to hold the filling.
- Avoid overloading with sauces.
- Eat immediately for best texture.