Traditionally, bakers vigorously knead dough to physically align proteins and build gluten. The no-knead method skips this step. Instead, a slow, extended fermentation (often called the “rise” or “proof”) allows naturally occurring enzymes in the flour and a small amount of yeast to develop the gluten network effortlessly
In a large mixing bowl, warm water is the first thing I pour in. I add sugar right into it and stir until it disappears completely. This step matters because the sugar helps wake up the yeast properly. Once that’s done, I sprinkle the yeast over the surface and just leave it alone. No stirring at this point. I let it sit quietly for about 10 to 15 minutes. What I’m looking for is that foamy, slightly bubbly surface—that’s how I know the yeast is active and ready to work.
While that’s happening, I take a separate bowl and mix the dry ingredients. Flour goes in first, then salt. I whisk them together just enough so the salt is evenly distributed. It doesn’t need anything fancy—just a light mix so there are no pockets of salt later in the dough.
Bringing everything together
Once the yeast mixture is frothy and alive-looking, I pour it into the flour bowl. I also add the oil at this stage. Then I switch to a spatula and start mixing everything together.
At first, it looks messy—sticky clumps, bits of dry flour, uneven texture. That’s exactly what it’s supposed to look like. I keep folding and pressing the mixture against the sides of the bowl until it comes together into a shaggy dough. I don’t knead it. I just make sure there are no dry patches left.
The dough at this stage is soft, sticky, and a little rough around the edges. That’s perfect for this kind of bread because it will develop texture during the long rise instead of through kneading.
First rise: letting time do the work
Once the dough is mixed, I cover the bowl tightly with plastic wrap and leave it at room temperature. This is the part where patience matters more than effort.
I usually let it rise for about 1.5 to 3 hours depending on the room temperature. On warmer days, it rises faster. On cooler days, it takes its time. What I look for is that it doubles in size and becomes airy when I peek inside.
During this stage, I don’t disturb it. The dough slowly builds flavor and structure on its own. This long rest is what gives the bread that rustic taste and soft interior later on.
Shaping the loaf without overworking it
Once the dough has doubled, I gently loosen it from the sides of the bowl using a spatula. Instead of punching it down aggressively, I just fold it over itself a few times. The goal is to keep as much air inside as possible.
Then I shape it into a round loaf using lightly greased hands. It doesn’t need to be perfect. Rustic bread always looks better when it’s a bit uneven.
If I want smaller portions, I sometimes divide the dough into rough rolls instead, but most of the time I stick with one loaf for a better crust-to-soft center ratio.
Second rise inside the air fryer basket
This is where things get a little different from oven bread.
I line the air fryer basket with perforated parchment paper so air can still circulate. Then I gently place the shaped dough inside. I don’t cover it at this point. I let it rest directly in the basket for about 30 minutes.
This second rise is shorter but important. It helps the dough relax and puff up slightly before heat hits it. I usually notice it becomes a bit more airy and soft during this time.
Air frying the bread
Before cooking, I take the dough out briefly and preheat the air fryer to 350°F (180°C) for about 3 to 5 minutes. Preheating helps the crust form properly from the start.
Then I carefully place the dough back into the basket with the parchment paper. I set it to cook at 350°F (180°C) for 20 to 25 minutes.
Halfway through, around the 12-minute mark, I flip the bread. This step is important because it helps both sides brown evenly and gives the crust that deep golden finish. It also prevents one side from becoming too soft.
As it cooks, the smell starts to change—it becomes warm, slightly nutty, and very comforting. By the end of the cooking time, the crust should look deep golden and firm.
Checking doneness and cooling
When the timer goes off, I tap the top of the bread. If it sounds hollow, that’s how I know it’s done.
I take it out carefully and place it on a wire rack. This part is important—I never slice it right away. I let it cool completely so the inside sets properly and doesn’t turn gummy.
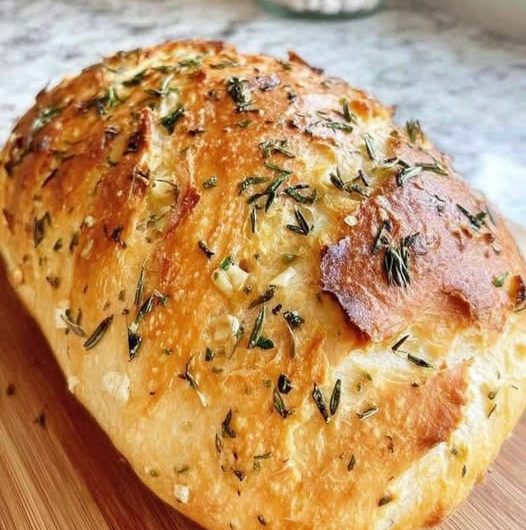
Once cooled, the crust stays crisp, and the inside turns soft, airy, and slightly chewy. That contrast is what makes this simple bread feel special even though it uses just a few basic ingredients.
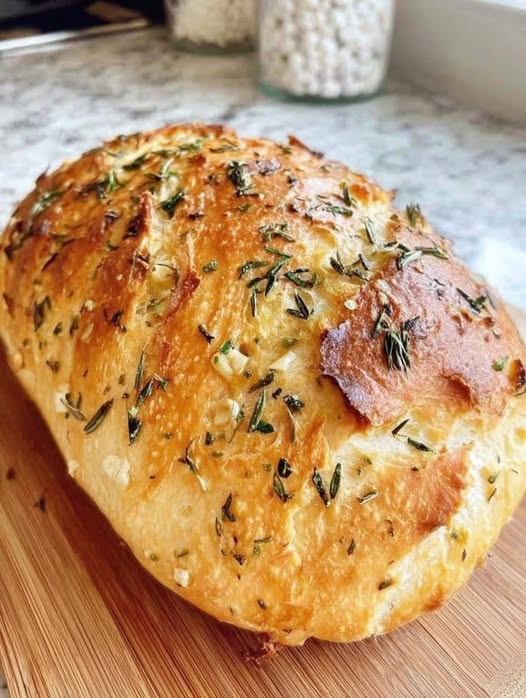
Air Fryer No Knead Bread
A simple 5-ingredient rustic bread made in the air fryer using a slow-rise method. Crisp crust on the outside, soft and airy inside, with no kneading required.
4
servings15
minutes25
minutes300
kcalIngredients
2 cups 300 g bread flour or all-purpose flour
1 tsp 3g active dry or instant yeast
2 tbsp 25g sugar
1/2 tsp 3g salt
3/4 cup ml warm water
2 tbsp 20ml olive oil or vegetable oil
Directions
- Mix warm water and sugar in a bowl. Sprinkle yeast on top and let it sit 10–15 minutes until foamy.
- In another bowl, combine flour and salt.
- Add yeast mixture and oil to dry ingredients. Mix until a sticky, shaggy dough forms. No kneading.
- Cover and let rise 1.5–3 hours until doubled in size.
- Gently fold dough and shape into a round loaf.
- Place in air fryer basket lined with perforated parchment paper. Let rest 30 minutes.
- Preheat air fryer to 350°F (180°C) for 3–5 minutes.
- Air fry at 350°F (180°C) for 20–25 minutes, flipping halfway through.
- Remove when golden and hollow-sounding. Cool completely before slicing.
Notes
- Longer first rise gives better flavor and texture.
- Do not knead—gentle mixing keeps the crumb airy.
- Always cool fully before cutting to avoid a gummy center.
- Perforated parchment helps airflow and prevents sticking