Ingredients
Coconut Filling
- 2 cups unsweetened shredded coconut
Use finely shredded coconut for a smoother, classic Bounty texture. Coarse shreds will result in a rougher bite. - 1/2 cup full-fat coconut cream
Use thick coconut cream only, not coconut milk. If refrigerated, scoop the solid part. - 1/4 cup powdered erythritol or powdered monk fruit sweetener
Powdered sweetener is critical. Granulated will not dissolve and will cause grit. - 2 tablespoons melted coconut oil
This helps the bars firm up while staying tender. - 1 teaspoon vanilla extract
Optional, but it rounds out the flavor. - 1/8 teaspoon salt
Do not skip. It enhances the coconut flavor.
Chocolate Coating
- 120 g (about 4 oz) sugar-free dark chocolate
Look for chocolate sweetened with erythritol or stevia. 85–95% cocoa also works if you prefer very low sweetness.
OR, homemade chocolate option:
- 1/3 cup cocoa butter
- 1/4 cup unsweetened cocoa powder
- 2–3 tablespoons powdered sweetener
- 1/2 teaspoon vanilla extract
- Pinch of salt
Equipment
- Medium mixing bowl
- Silicone spatula or spoon
- Small saucepan or microwave-safe bowl
- Parchment paper
- Baking sheet or flat tray
- Sharp knife (if shaping by hand)
- Fork or dipping tool
Step-by-Step Instructions
Step 1: Prepare the Coconut Filling
In a medium bowl, add the shredded coconut, powdered sweetener, and salt. Stir well to evenly distribute the sweetener.
Add the coconut cream and melted coconut oil. Mix thoroughly until the mixture becomes thick, sticky, and holds together when pressed.
The texture should be:
- Moist but not wet
- Able to form a compact shape
- Not crumbly
If the mixture feels too dry, add 1 tablespoon of coconut cream at a time.
If it feels too wet, add a small amount of shredded coconut.
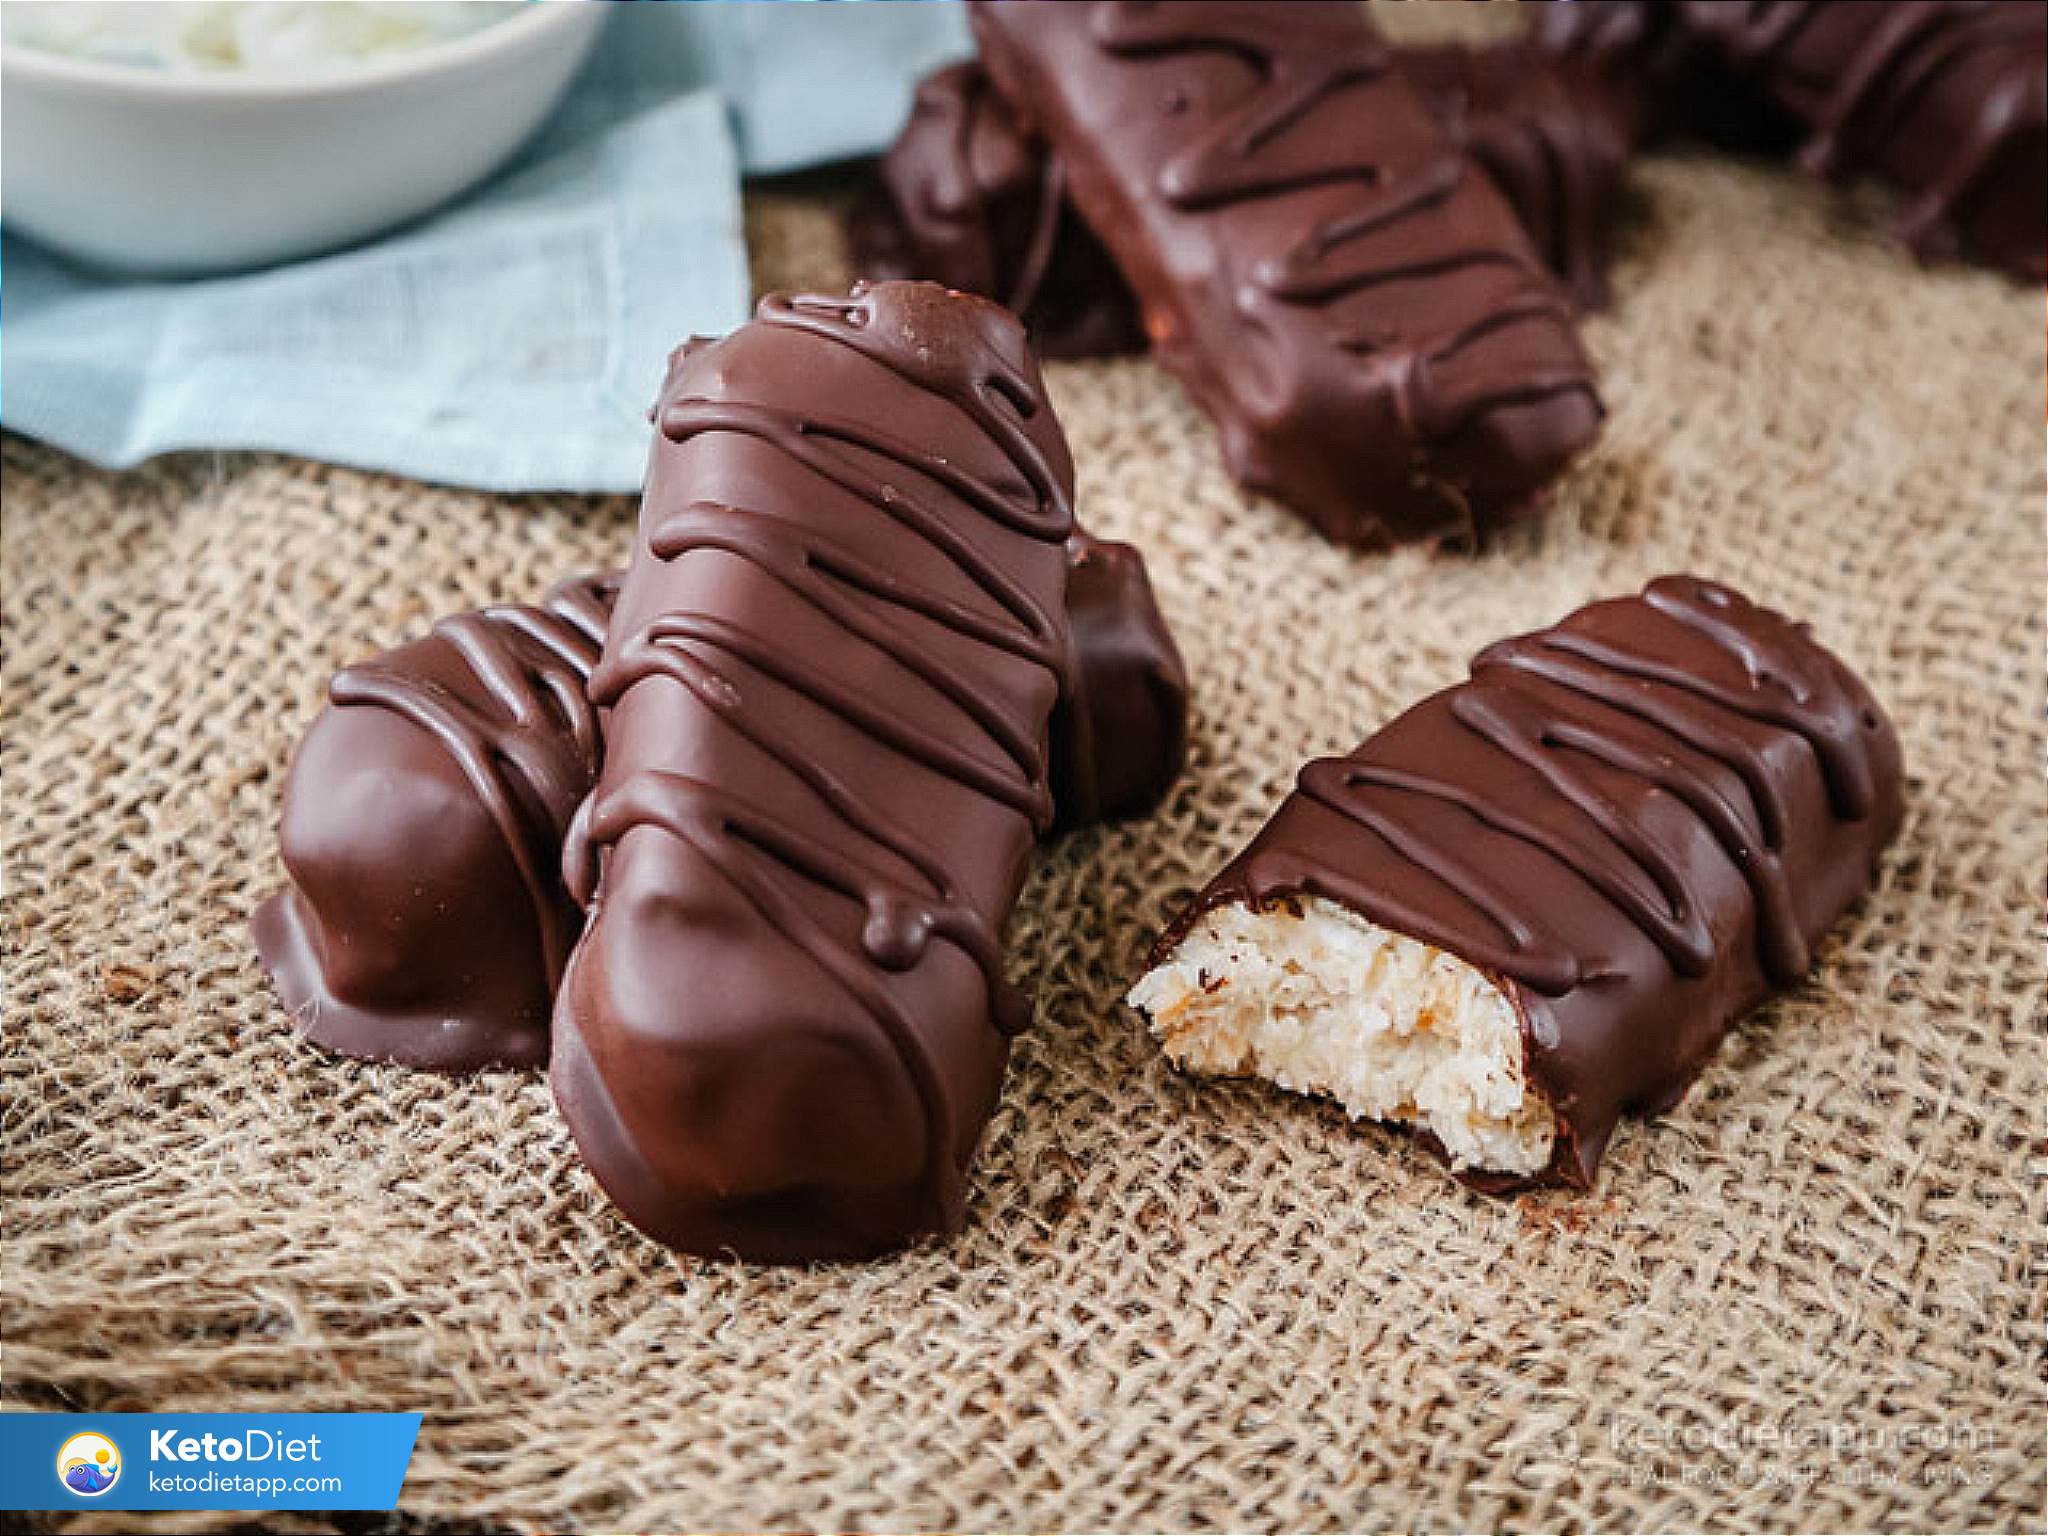
Step 2: Shape the Bars
Line a tray or baking sheet with parchment paper.
Divide the coconut mixture into equal portions. Shape each portion into a rectangular bar using your hands. Press firmly so there are no air pockets.
Aim for bars about:
- 8–9 cm long
- 2–3 cm wide
- 1.5 cm thick
Place each bar onto the parchment-lined tray.
Step 3: Freeze the Bars
Place the tray in the freezer for 30–45 minutes.
This step is essential. The bars must be firm before dipping or the coconut will fall apart in the chocolate.
Step 4: Prepare the Chocolate Coating
If using store-bought sugar-free chocolate:
Melt the chocolate gently using a double boiler or microwave in 20-second intervals. Stir frequently until smooth.
If making homemade chocolate:
- Melt cocoa butter gently over low heat.
- Remove from heat and whisk in cocoa powder, powdered sweetener, vanilla, and salt.
- Stir until completely smooth and glossy.
Let the chocolate cool slightly. It should be fluid but not hot.
Step 5: Coat the Bars
Remove coconut bars from the freezer.
Using a fork, dip each bar into the melted chocolate. Turn to coat all sides evenly.
Lift the bar out, allow excess chocolate to drip off, then place it back onto the parchment paper.
For a thicker chocolate shell, let the first layer set in the fridge for 10 minutes, then dip again.
Step 6: Set the Chocolate
Place the coated bars in the refrigerator for 15–20 minutes, or until the chocolate is fully set.
Once set, they are ready to eat.
Storage
- Refrigerator: up to 7 days in an airtight container
- Freezer: up to 2 months
For best texture, let frozen bars sit at room temperature for 5 minutes before eating.
Texture and Flavor Adjustments
For a softer center:
- Add 1–2 extra tablespoons of coconut cream
For a firmer, chewier bar:
- Add 1 additional tablespoon of coconut oil
For stronger coconut flavor:
- Add 1/4 teaspoon coconut extract
For sweeter bars:
- Increase powdered sweetener by 1 tablespoon
Keto Macros (Approximate, per bar if making 12)
- Calories: 180–200
- Fat: 17–18 g
- Protein: 2 g
- Total carbs: 6 g
- Net carbs: 2–3 g (depending on chocolate used)