These Keto Bounty Bars combine a creamy coconut center with a smooth sugar-free chocolate coating to create an easy homemade low-carb dessert. Each bar has the familiar combination of coconut and chocolate but is prepared with keto-friendly ingredients, including unsweetened coconut, natural coconut yogurt, erythritol, vanilla essence, and sugar-free chocolate chips. The recipe makes eight individual bars, with approximately 3 grams of net carbohydrates per serving.
One of the best things about this easy Keto Bounty Bars recipe is that no oven is required. The coconut filling is prepared in a food processor, shaped into bars, refrigerated until firm, and then dipped in melted sugar-free chocolate. After a final chilling period, the chocolate becomes firm and the coconut center holds its shape. Although the bars require several hours to set, the hands-on preparation is relatively short and straightforward.
What Are Keto Bounty Bars?
Keto Bounty Bars are homemade coconut chocolate bars designed to deliver the creamy coconut and dark chocolate combination associated with coconut candy bars while keeping carbohydrates lower. Instead of using a traditional sugary coconut filling and conventional milk chocolate, this version relies on unsweetened flaked coconut, sugar-free coconut yogurt, erythritol, and sugar-free chocolate chips.
The finished bars have two distinct textures. Inside, the processed coconut and yogurt create a moist, slightly chunky filling. Outside, melted sugar-free chocolate forms a firmer shell after refrigeration. This contrast between the soft coconut center and crisp chocolate coating is what makes these homemade keto coconut bars particularly satisfying as a chilled dessert or low-carb snack.
Why This Recipe Works
The ingredient list is short, but every component has an important purpose. Unsweetened flaked coconut provides the main texture and flavor. Natural coconut yogurt adds moisture and helps bind the coconut together. Erythritol provides sweetness without using regular sugar, while vanilla essence rounds out the coconut flavor. Finally, sugar-free chocolate chips create the outer coating.
The recipe also avoids unnecessary baking or complicated candy-making techniques. The food processor handles most of the work required for the filling. Refrigeration firms the shaped bars enough for dipping, and gently melted chocolate creates the coating. This simple process makes the recipe approachable for anyone looking for an easy keto dessert that can be prepared without advanced baking skills.
A Simple No-Bake Keto Dessert
No-bake keto desserts can be especially convenient when you want something sweet without heating the oven. These Keto Bounty Bars require only a food processor, a lined baking tray, a refrigerator, and basic equipment for melting chocolate. Most of the recipe time is inactive because the coconut bars need to chill before and after they are coated.
The first chilling period is particularly important. Once the coconut mixture has been shaped into eight rectangular bars, it should remain refrigerated for at least three hours. Leaving the bars overnight is also an option. This gives the coconut mixture enough time to become firm before dipping, making the pieces easier to handle when they are placed into the melted chocolate.
Unsweetened Flaked Coconut Creates the Filling
The recipe uses two cups of unsweetened flaked coconut as the main ingredient. Flaked coconut gives the filling a noticeable coconut texture rather than turning it completely smooth. Once processed with coconut yogurt, erythritol, and vanilla essence, the flakes become part of a chunky paste that can be pressed and molded into individual bars.
Using unsweetened coconut is important for this specific keto recipe because sweetened coconut would introduce additional sugar and carbohydrates. The recipe intentionally uses unsweetened flaked coconut and adds sweetness separately with erythritol. This provides more control over the sweetness while preserving the natural flavor and texture of coconut.
Why Coconut Yogurt Is Important
Half a cup of natural coconut yogurt provides the moisture needed to transform the dry coconut flakes into a moldable filling. The original recipe recommends choosing a full-fat, sugar-free coconut yogurt with a low carbohydrate content. Since yogurt brands can vary significantly in their ingredients and nutrition, checking the package is useful when carbohydrate intake is important.
The coconut yogurt also strengthens the overall coconut flavor without requiring additional oils or syrups. When blended with the flaked coconut in a food processor, it helps bind the mixture together. The resulting paste should be cohesive enough to shape into rectangular bars while still maintaining some of the texture from the coconut flakes.
Sweetening the Bars with Erythritol
Two tablespoons of erythritol provide sweetness to the coconut filling. Since the coconut itself is unsweetened and the yogurt should also be sugar-free, this ingredient supplies the sweetness normally expected in a coconut candy bar. The relatively simple filling allows the natural coconut flavor to remain prominent instead of being overwhelmed by a large number of additional ingredients.
Erythritol is added directly to the food processor along with the coconut, yogurt, and vanilla essence. Processing these ingredients together distributes the sweetener throughout the mixture. There is no separate syrup to cook or sugar mixture to dissolve, which keeps the preparation simple and contributes to the no-bake nature of the recipe.
Adding Vanilla to the Coconut Center
One teaspoon of vanilla essence may seem like a small ingredient, but it helps round out the overall flavor of the coconut filling. Vanilla works particularly well with both coconut and chocolate, making it a useful bridge between the creamy center and the chocolate coating. It is added directly to the food processor with the other filling ingredients.
Because this recipe uses only five ingredients, small flavor additions have a noticeable role. The vanilla does not overpower the coconut; instead, it gives the filling a softer dessert-like aroma. Once the bars are coated in chocolate and chilled, the vanilla becomes part of the balanced combination of sweet coconut and rich chocolate.
Choosing Sugar-Free Chocolate Chips
The outer coating uses three ounces of sugar-free chocolate chips. This ingredient transforms the shaped coconut filling into finished Keto Bounty Bars by creating a rich chocolate shell. Since the chocolate forms the entire exterior of each bar, selecting sugar-free chocolate chips that fit your preferred carbohydrate goals is important.
The original recipe notes that additional chocolate may make dipping easier, but the specified recipe quantity remains three ounces and has not been changed here. The chocolate should be melted gently rather than exposed to excessive direct heat. A heatproof bowl placed over a small saucepan of simmering water provides controlled heat and reduces the risk of scorching.
How to Make the Coconut Filling
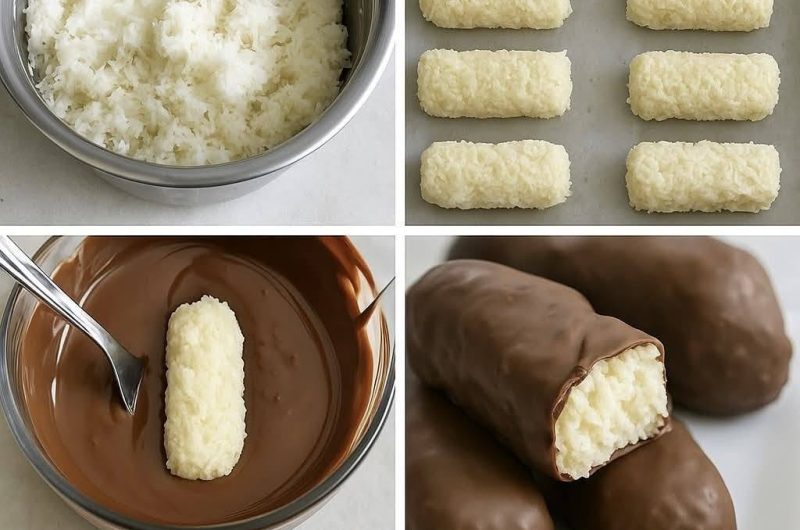
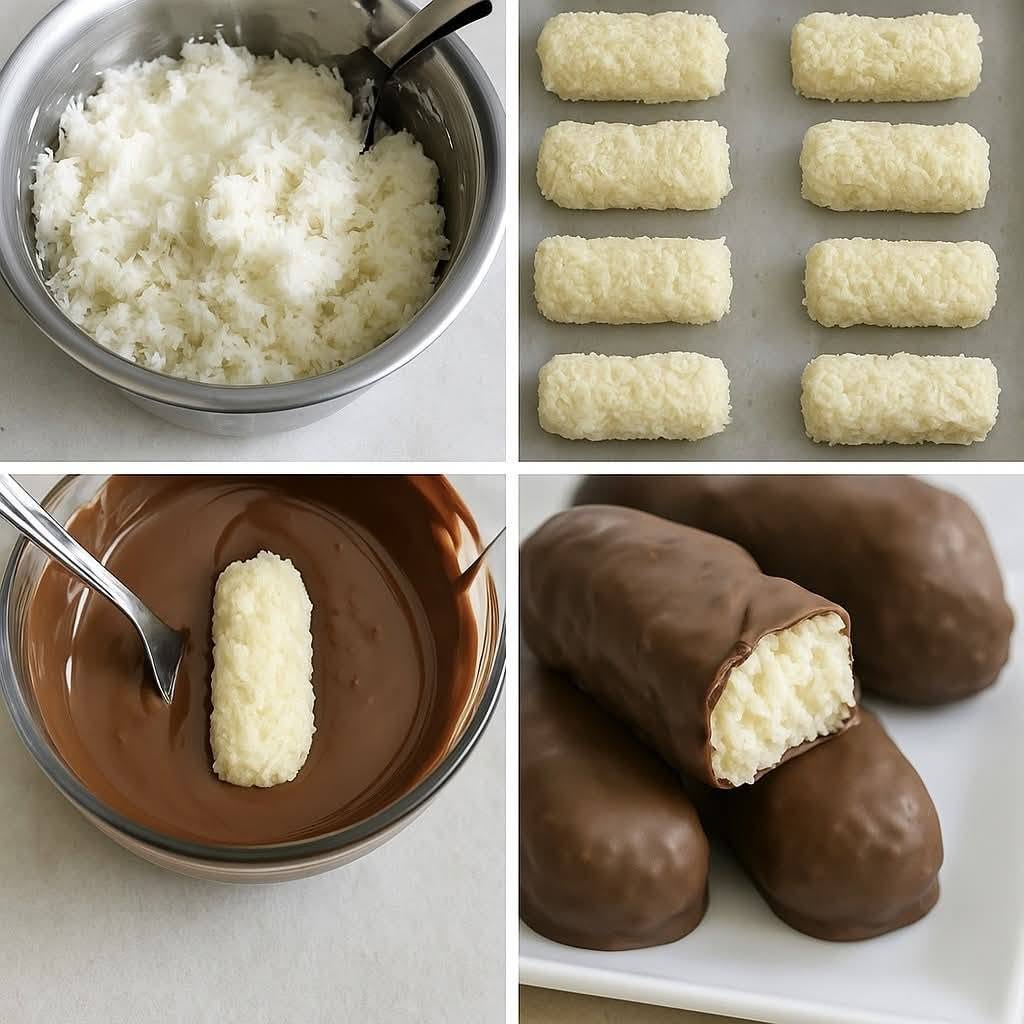
Begin by placing two cups of unsweetened flaked coconut, half a cup of natural coconut yogurt, two tablespoons of erythritol, and one teaspoon of vanilla essence into a food processor. Process the ingredients until they form a chunky paste. The mixture does not need to become completely smooth because some coconut texture is desirable in the finished bars.
Once processed, divide the mixture into eight portions and mold each portion into a rectangular bar shape. Place the shaped pieces onto a baking tray lined with parchment paper. The mixture can be somewhat sticky, so work carefully while shaping. Keeping the bars similar in size also helps produce eight consistent servings and makes the final chocolate-dipping stage easier.
Why the First Chilling Period Matters
After shaping the coconut mixture, cover the bars and place them in the refrigerator for at least three hours. For an even firmer result, they can be refrigerated overnight. This stage should not be skipped because the coconut filling needs time to become firm enough to withstand being dipped into warm melted chocolate.
If the bars are too soft, they can become difficult to lift from the chocolate without losing their rectangular shape. Proper refrigeration gives the coconut yogurt and coconut mixture enough firmness to hold together. For this reason, although the active preparation is relatively quick, this recipe should be planned several hours before you intend to serve the finished bars.
How to Melt the Sugar-Free Chocolate
Place the sugar-free chocolate chips in a heatproof bowl positioned over a small saucepan containing gently simmering water. The bowl should be heated indirectly rather than sitting in the water. Stir the chocolate as it begins to soften. When approximately 60 percent of the chocolate has melted, remove the bowl from the heat.
Continue stirring after removing it from the heat. The remaining chocolate should gradually melt from the residual warmth until the mixture becomes smooth. This gentle method helps prevent the chocolate from becoming overheated. Smoothly melted chocolate is easier to distribute over the chilled coconut bars and provides a more even coating after refrigeration.
Coating the Keto Coconut Bars
Work with one chilled coconut bar at a time. Drop the bar carefully into the melted chocolate and use a fork to drizzle chocolate over the surface until the coconut filling is covered. Once coated, lift the bar gently with the fork and allow excess chocolate to drip back into the bowl.
Lightly tap the fork against the edge of the bowl to remove additional excess chocolate. Transfer the coated bar back to the parchment-lined tray, using a butter knife to help slide it from the fork if necessary. Repeat the process with all eight bars. Working carefully helps preserve the rectangular shape and gives each piece a consistent chocolate coating.
Setting the Chocolate Coating
Once all eight coconut bars have been coated, return the tray to the refrigerator. The bars require another one to two hours of chilling for the chocolate to set properly. During this time, the coating becomes firm while the coconut center remains chilled and creamy.
The second refrigeration stage is what turns the freshly dipped bars into a finished candy-style dessert. Although it can be tempting to eat one immediately after dipping, allowing the chocolate to set gives the bars a much better texture. When properly chilled, the firm outer chocolate contrasts with the softer coconut filling inside.
How Long Do Keto Bounty Bars Take?
The source recipe lists 20 minutes as cooking and total time, but this does not include the required refrigeration. A more useful schedule is approximately 20 minutes of active preparation plus at least three hours of initial chilling and another one to two hours after coating. Therefore, you should allow roughly 4 hours 20 minutes to 5 hours 20 minutes from preparation to serving.
If the coconut centers are refrigerated overnight, the total elapsed time will naturally be longer. This does not mean the recipe requires hours of work. Most of the time is completely hands-off while the refrigerator firms the filling and sets the chocolate. The actual mixing, shaping, melting, and coating stages remain relatively quick.
Getting the Right Coconut Texture
The recipe specifically uses unsweetened flaked coconut, which produces a more noticeable, chunky texture in the center. The source also mentions that finer coconut would change the texture, but because the instruction here is to preserve the original ingredients, this rewritten version retains the two cups of unsweetened flaked coconut exactly as supplied.
Do not process the filling so aggressively that all of the coconut texture disappears. The goal is a chunky paste that holds together when molded. The filling should feel cohesive rather than dry and crumbly. Once chilled, this texture produces a satisfying coconut center that contrasts well with the smooth sugar-free chocolate coating.
Keeping the Bars from Falling Apart
Firm chilling before dipping is the most important step for keeping the bars intact. After molding the filling into eight rectangles, refrigerate it for the full three hours at minimum. Overnight chilling can provide an even firmer base. Trying to coat soft bars too early may make them harder to handle when they come into contact with the warm chocolate.
Handle each bar individually and avoid leaving the entire tray at room temperature for too long during dipping. Lift the coated bars gently with a fork and let the excess chocolate drain naturally rather than shaking them aggressively. Careful handling helps preserve the coconut center and keeps the coating process manageable.
Serving Keto Bounty Bars
These homemade Keto Bounty Bars are best enjoyed after the chocolate coating has completely set. Since the recipe makes eight servings and one serving equals one bar, portioning is already built into the preparation. The individual bar shape makes them easy to serve as a low-carb dessert or a sweet keto snack.
Their coconut and chocolate combination works particularly well when you want a dessert that feels more like a candy bar than a traditional baked cake or cookie. The bars can be arranged on a serving plate straight from the refrigerator, allowing the firm chocolate exterior and chilled coconut center to provide the intended texture.
Net Carbohydrates in Keto Bounty Bars
According to the nutritional information supplied with the original recipe, one serving contains 6 grams of total carbohydrates and 3 grams of fiber. This gives approximately 3 grams of net carbohydrates per bar. Each serving also contains 218 calories, 21 grams of fat, and 3 grams of protein.
Nutrition can vary according to the specific coconut yogurt and sugar-free chocolate chips used. Products marketed as sugar-free can contain different sweeteners and carbohydrate levels, so anyone tracking carbohydrates closely should check the labels of the particular ingredients being used. The nutrition information provided in the recipe card below retains the values supplied with the original recipe.
Notes for the Best Keto Bounty Bars
Use unsweetened flaked coconut and choose natural coconut yogurt that is full-fat, sugar-free, and relatively low in carbohydrates. Process the filling only until it forms a chunky paste. Shape the eight bars firmly and give them sufficient refrigeration time before attempting to coat them with chocolate.
Melt the sugar-free chocolate gently using indirect heat and remove it from the heat when it is approximately 60 percent melted. Continue stirring until smooth rather than overheating it. Dip one chilled bar at a time, drain away excess chocolate, and return each piece to the lined tray. Finally, refrigerate for another one to two hours before serving.
Why These Homemade Keto Bounty Bars Are Worth Making
This Keto Bounty Bars recipe combines several qualities that make a useful low-carb dessert: a short ingredient list, no baking, individual portions, and a classic chocolate-coconut flavor. Only five ingredients are needed, and most of the total preparation time is spent waiting for the bars to chill rather than actively working in the kitchen.
The finished dessert provides a creamy coconut center surrounded by sugar-free chocolate, creating a satisfying combination of soft and firm textures. With approximately 3 grams of net carbohydrates per serving according to the supplied nutrition data, these easy homemade keto coconut bars offer a practical option when you want a chilled chocolate dessert that fits naturally into a low-carb recipe collection.
Keto Bounty Bar Recipe
Easy homemade Keto Bounty Bars featuring a creamy coconut center coated in sugar-free chocolate.
8
servings20
minutes3
hours218
kcal3
hours20
minutesIngredients
2 cups unsweetened flaked coconut
½ cup natural coconut yogurt
2 tablespoons erythritol
1 teaspoon vanilla essence
3 ounces sugar-free chocolate chips
Directions
- Add the coconut, coconut yogurt, erythritol, and vanilla essence to a food processor.
- Process until a chunky paste forms.
- Divide the mixture into 8 portions and shape each into a rectangular bar.
- Place the bars on a parchment-lined baking tray.
- Cover and refrigerate for at least 3 hours, or overnight for a firmer texture.
- Place the chocolate chips in a heatproof bowl over a small saucepan of simmering water.
- Heat until approximately 60% of the chocolate has melted.
- Remove from the heat and stir until completely melted and smooth.
- Dip one chilled coconut bar at a time into the melted chocolate.
- Use a fork to coat the bar and lift it from the chocolate.
- Tap gently against the bowl to remove excess chocolate.
- Return the coated bar to the lined tray and repeat with the remaining bars.
- Refrigerate for another 1–2 hours, or until the chocolate is completely set.
- Serve chilled.
Nutrition Facts
8 servings per container
- Amount Per ServingCalories218
- % Daily Value *
- Total Fat
21g
27%
- Total Carbohydrate
6g
3%
- Protein 3g 6%
* The % Daily Value tells you how much a nutrient in a serving of food contributes to a daily diet. 2,000 calories a day is used for general nutrition advice.