No-Egg, No-Kneading, No-Butter Air Fryer Bread
This recipe creates a soft, fluffy bread using simple ingredients. There are no eggs, no kneading, and no butter. The dough is mixed with a spoon, allowed to rise, and then baked in an air fryer. The instructions are written in a detailed step-by-step format for maximum readability.
What This Recipe Makes
- 1 medium round loaf
- Approximately 8–10 servings
- Soft interior with a lightly crisp crust
- Suitable for sandwiches, toast, or serving alongside meals
Preparation Time
- Mixing time: 10 minutes
- First rise: 60–90 minutes
- Second rise: 20–30 minutes
- Air fryer baking time: 20–30 minutes
Total time depends on room temperature and dough rising speed.
Ingredients
Dry Ingredients
- 3 cups (375 g) all-purpose flour
- 1 tablespoon sugar
- 1 teaspoon salt
- 2 teaspoons instant yeast
Wet Ingredients
- 1 cup plus 2 tablespoons (270 ml) warm water
- 2 tablespoons vegetable oil
The water should feel warm but not hot. If the water is too hot, it can damage the yeasr
Understanding the Ingredients
Flour
All-purpose flour works very well in this recipe. Bread flour can also be used and may create a slightly chewier texture.
Yeast
Instant yeast is easiest because it can be mixed directly with the flour. If using active dry yeast, dissolve it in the warm water with the sugar and let it sit for 5–10 minutes before mixing.
Sugar
Sugar helps feed the yeast and improves browning. The bread will not taste sweet.
Salt
Salt improves flavor and helps strengthen the dough structure.
Oil
Since this recipe contains no butter, oil provides softness and helps keep the bread moist.
Water
Water hydrates the flour and activates the yeast. Warm water encourages proper rising.
Step 1: Prepare the Dry Mixture
Take a large mixing bowl.
Add:
- 3 cups flour
- 1 tablespoon sugar
- 1 teaspoon salt
- 2 teaspoons instant yeast
Using a spoon, mix everything thoroughly.
Make sure the yeast is distributed evenly throughout the flour.
Step 2: Add the Wet Ingredients
Pour the warm water into the bowl.
Add the vegetable oil.
Using a wooden spoon or spatula, stir slowly at first.
Continue mixing until no dry flour remains.
The dough will look:
- Sticky
- Rough
- Slightly shaggy
This is completely normal.
Do not add large amounts of extra flour.
Because this is a no-knead recipe, the dough should be softer than traditional bread dough.
Step 3: Rest the Dough Briefly
After mixing, leave the dough in the bowl for 10 minutes.
This short resting period allows the flour to absorb the water.
You may notice the dough becoming smoother.
This simple waiting step improves texture without any kneading.
Step 4: First Rise
Lightly coat the top of the dough with a few drops of oil.
Cover the bowl with:
- Plastic wrap
- A plate
- Or a clean kitchen towel
Place the bowl in a warm area.
Allow the dough to rise until roughly doubled in size.
This usually takes:
- 60 minutes in a warm kitchen
- Up to 90 minutes in a cooler kitchen
How to know the dough is ready:
- It looks puffy.
- It has increased significantly in size.
- Small air bubbles may be visible.
Step 5: Prepare the Baking Pan
Choose a pan that fits comfortably inside your air fryer basket.
Lightly grease the pan with oil.
You can also line the bottom with baking paper if desired.
This helps prevent sticking.
Step 6: Shape the Dough
Once the dough has doubled, use a spoon or lightly oiled hands to gently release it from the bowl.
Do not punch it down aggressively.
Fold the edges toward the center a few times.
The goal is simply to create a rough round shape.
Because the dough is soft, perfect shaping is not necessary.
Transfer the dough to the prepared pan.
Smooth the top gently.
Step 7: Second Rise
Cover the pan loosely.
Allow the dough to rest again for 20–30 minutes.
During this period, the dough will become puffier.
This second rise helps create a lighter texture.
The dough does not need to double completely.
A noticeable increase in size is enough.
Step 8: Preheat the Air Fryer
Preheat the air fryer to 160°C (320°F) for 3–5 minutes.
Preheating helps the bread start baking immediately and promotes a better rise.
Step 9: Bake the Bread
Place the pan carefully into the air fryer basket.
Bake at 160°C (320°F) for 20 minutes.
Check the bread.
If the top is becoming dark too quickly, place a loose piece of aluminum foil over it.
Continue baking for another 5–10 minutes if needed.
The bread is done when:
- The top is golden brown.
- The loaf sounds hollow when tapped.
- A skewer inserted into the center comes out clean.
Every air fryer cooks differently, so baking times may vary.
Step 10: Cooling the Bread
Remove the pan from the air fryer.
Let the bread rest in the pan for 5 minutes.
Carefully remove it from the pan.
Place it on a cooling rack.
Allow the bread to cool for at least 30 minutes before slicing.
Cutting while hot can make the texture gummy.
Patience gives better results.
Tips for the Softest Bread
Use Warm Water
Water that is comfortably warm encourages yeast activity and improves rising.
Keep the Dough Soft
A sticky dough often produces softer bread than a stiff dough.
Avoid Excess Flour
Adding too much flour can make bread dense and dry.
Give the Dough Enough Time
Proper rising is one of the most important factors for fluffy bread.
Cool Before Slicing
Cooling allows the internal structure of the bread to finish setting.
Optional Flavor Variations
Garlic Bread Version
Add:
- 1 teaspoon garlic powder
- 1 teaspoon dried parsley
Mix them with the flour.
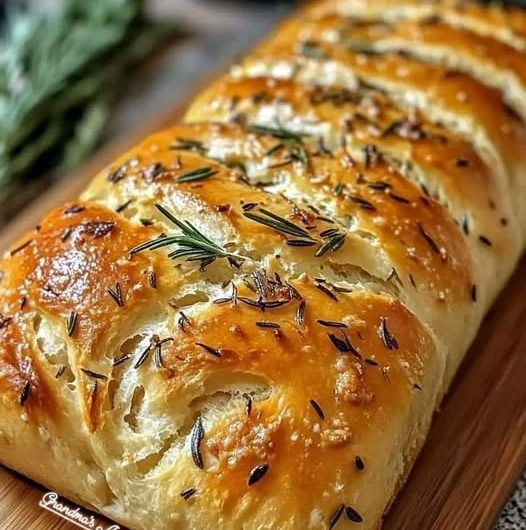
Herb Bread Version
Add:
- 1 teaspoon dried oregano
- 1 teaspoon dried basil
- ½ teaspoon dried thyme
Whole Wheat Version
Replace 1 cup of all-purpose flour with whole wheat flour.
You may need 1–2 additional tablespoons of water.
Sesame Bread Version
Sprinkle sesame seeds over the top before baking.
Storage Instructions
Room Temperature
Store in an airtight container or bread bag.
The bread stays fresh for about 2–3 days.
Refrigerator
Store for up to 1 week.
Warm slices before serving for the best texture.
Freezer
Wrap tightly and freeze for up to 2 months.
Thaw at room temperature before eating.
Troubleshooting Guide
Bread Did Not Rise
Possible causes:
- Yeast was expired.
- Water was too hot.
- The room was too cold.
- Rising time was too short.
Bread Is Dense
Possible causes:
- Too much flour was added.
- Dough did not rise enough.
- Bread was underproofed before baking.
Top Is Too Dark
Possible causes:
- Temperature was too high.
- Bread was placed too close to the heating element.
Cover loosely with foil during the final part of baking.
Bread Is Doughy Inside
Possible causes:
- Baking time was too short.
- Loaf was too large.
- Air fryer temperature was inaccurate.
Bake a few minutes longer and verify doneness with a skewer.
Final Recipe Summary
- Mix flour, sugar, salt, and yeast.
- Add warm water and oil.
- Stir until a sticky dough forms.
- Rest 10 minutes.
- Let rise 60–90 minutes.
- Transfer to a greased pan.
- Rise again for 20–30 minutes.
- Preheat air fryer to 160°C.
- Bake 20–30 minutes.
- Cool completely before slicing.
The result is a simple homemade air fryer bread that is soft, fluffy, economical, beginner-friendly, and made without eggs, kneading, or butter.