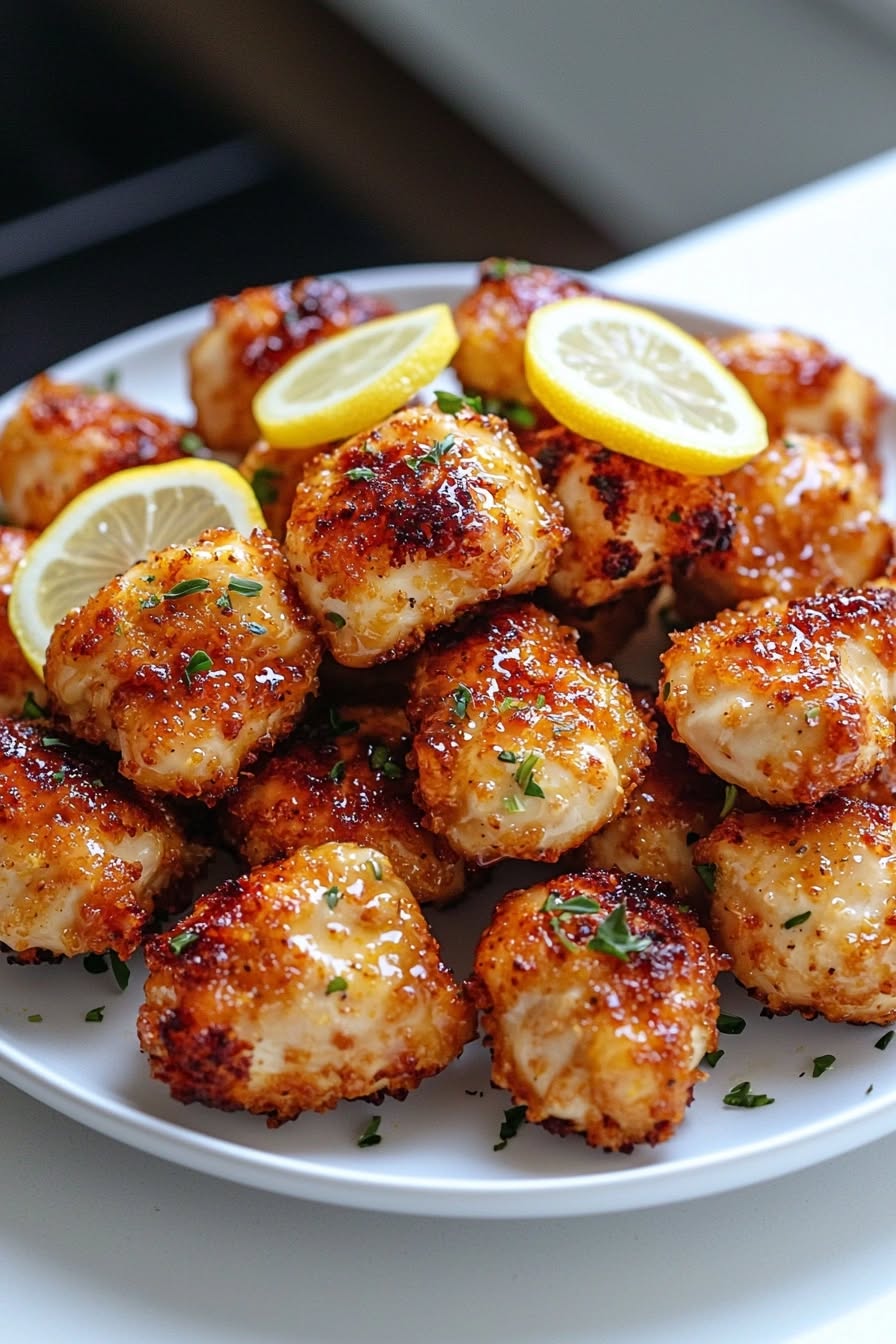
Honey garlic chicken is one of those meals that comes together with simple pantry ingredients and delivers plenty of flavor. The combination of honey, garlic, and soy sauce creates a glaze that coats every piece of chicken with a balance of sweetness and savory richness. This recipe uses everyday ingredients and a single skillet, making it suitable for both busy weeknights and relaxed family dinners.
Why This Recipe Works
The flavor of this dish comes from a simple cooking method rather than complicated ingredients. Seasoning the chicken before cooking allows every bite to have flavor, while browning the chicken first develops a rich color and texture. Once the glaze is added, it slowly thickens in the pan until it lightly coats the chicken.
The recipe can be prepared with either boneless chicken thighs or chicken breasts. Thighs stay especially juicy during cooking, while chicken breasts offer a leaner option. Both work well because the glaze adds moisture and flavor.
Ingredients Used
This recipe keeps the ingredient list straightforward while creating a well-balanced sauce.
Chicken
The main ingredient is boneless, skinless chicken. Either thighs or breasts can be used depending on your preference. If using chicken breasts, cutting them into large pieces helps them cook more evenly.
Seasonings
Salt, black pepper, paprika, garlic powder, and onion powder provide a simple seasoning blend. These spices create a flavorful base before the sauce is added.
Cornstarch is optional but worth including if you prefer a lightly crisp exterior. During cooking it helps the chicken brown nicely and allows the glaze to cling to the surface.
Olive oil helps prevent sticking and encourages even browning.
Honey Garlic Glaze
The glaze combines honey, soy sauce, minced garlic, vinegar, ketchup, sesame oil, black pepper, and optional chili flakes.
Honey gives the sauce its signature sweetness and glossy finish.
Soy sauce balances the sweetness with a savory flavor.
Fresh garlic becomes fragrant as it cooks and provides the characteristic garlic flavor throughout the dish.
A small amount of vinegar brightens the sauce without making it overly tangy.
Ketchup is optional but adds depth and a slightly richer color.
Sesame oil contributes a subtle nutty aroma.
Chili flakes are optional for anyone who enjoys a mild amount of heat.
Preparing the Chicken
Before seasoning, pat the chicken dry with paper towels. Removing excess moisture helps the chicken brown instead of steam.
Place the chicken in a mixing bowl and add the salt, black pepper, paprika, garlic powder, and onion powder. If using cornstarch, sprinkle it evenly over the chicken before adding the olive oil.
Mix everything together until each piece is coated. Allow the chicken to rest for about 10 minutes. This short resting time gives the seasonings an opportunity to adhere while the chicken loses some of its chill, promoting more even cooking.
Mixing the Glaze
While the chicken rests, prepare the glaze.
Combine the honey, soy sauce, minced garlic, vinegar, ketchup (if using), sesame oil (if using), black pepper, and chili flakes (if desired) in a bowl. Whisk until the mixture is smooth and the honey is fully incorporated.
Having the sauce prepared before cooking begins makes the final steps much easier because the glaze is added immediately after the chicken has browned.
Browning the Chicken
Heat a large skillet over medium-high heat.
If necessary, add a small amount of oil to the pan. Arrange the chicken in a single layer, leaving a little space between each piece. Avoid overcrowding because too many pieces at once will trap moisture and prevent good browning.
Allow the chicken to cook undisturbed for four to five minutes. Once the underside develops a golden-brown color, turn each piece over and continue cooking for another four to five minutes.
At this point the chicken should be nearly cooked through. If the pan contains excess oil, carefully remove it before adding the glaze.
Finishing with the Honey Garlic Glaze
Reduce the heat to medium and pour the prepared glaze into the skillet.
As the sauce begins to simmer, stir gently so every piece of chicken is coated. Over the next few minutes the honey naturally thickens with the soy sauce and garlic, creating a shiny glaze that clings to the chicken.
Turn the chicken several times while the sauce cooks. This allows every surface to become evenly coated and prevents one side from becoming darker than the other.
If the glaze thickens more quickly than expected, stir in one or two tablespoons of water to loosen it slightly without reducing the flavor.
Continue cooking until the chicken reaches an internal temperature of 165°F (74°C) and the sauce is glossy.
Serving Ideas
This honey garlic chicken pairs well with a variety of simple side dishes, making it easy to build a complete meal. Steamed white rice or fragrant jasmine rice is a classic choice because it absorbs the extra glaze without competing with the flavors of the chicken. For a meal with more vegetables, serve it alongside stir-fried vegetables or roasted broccoli. The sweet and savory sauce also works well with fried rice or cooked noodles, creating a satisfying dinner with very little additional preparation. Leftover chicken can even be sliced and tucked into wraps or sandwiches for a quick lunch the next day.
Helpful Cooking Tips
Always preheat the skillet before adding the chicken, as a hot pan helps develop a golden-brown exterior. Cook the chicken in a single layer and avoid moving it too soon, allowing the surface to caramelize naturally. When it’s time to add the glaze, reduce the heat to medium so the honey thickens gradually instead of scorching. If the sauce becomes thicker than desired, simply stir in a tablespoon or two of water until it reaches a smooth, glossy consistency that evenly coats the chicken.
Storing and Reheating
If there are leftovers, allow the honey garlic chicken to cool completely before transferring it to an airtight container. It can be refrigerated for up to 3 to 4 days, making it a convenient option for meal preparation. To reheat, warm the chicken gently in a skillet over medium-low heat, adding a small splash of water if the glaze has thickened during storage. A microwave also works well for quick reheating, though using shorter intervals and stirring between each one helps keep the chicken tender. Once reheated, serve it with freshly cooked rice or vegetables for a meal that tastes just as enjoyable as when it was first prepared.
Serving Suggestions
- Steamed white rice
- Jasmine rice
- Fried rice
- Stir-fried vegetables
- Roasted broccoli
- Noodles
- Rice bowls with cucumbers and carrots
- Wraps or sandwiches
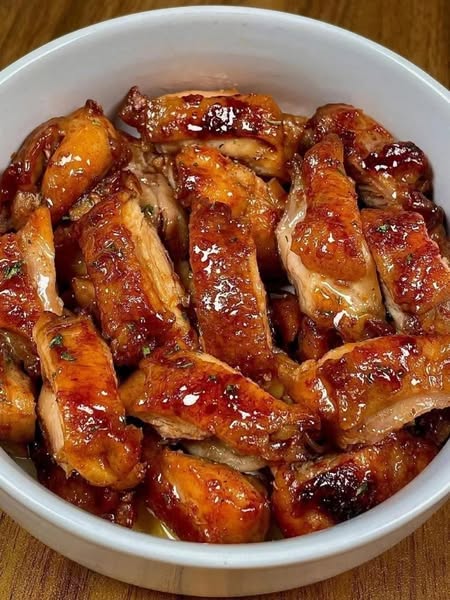
Honey Garlic Chicken – A Homemade Recipe
This Honey Garlic Chicken is made with juicy, seasoned chicken cooked until golden brown and coated in a rich honey garlic glaze. It’s a quick and flavorful skillet meal that’s perfect for serving with rice, noodles, or your favorite vegetables.
4-6
servings15
minutes15
minutes420
kcal30
minutesIngredients
2 pounds boneless, skinless chicken thighs or chicken breasts
1 teaspoon salt
1 teaspoon black pepper
1 teaspoon paprika
1 teaspoon garlic powder
1/2 teaspoon onion powder
2 tablespoon olive oil
1 tablespoon cornstarch (optional, for better browning)
- Honey Garlic Glaze
1/3 cup honey
1/4 cup low-sodium soy sauce
4-6 as required garlic cloves
1 tablespoon apple cider vinegar or rice vinegar
1 tablespoon ketchup (optional)
1 teaspoon sesame oil (optional)
1/2 teaspoon black pepper
1/4 teaspoon chili flakes (optional)
Directions
- Pat the chicken dry with paper towels. If using chicken breasts, leave them whole or cut them into large pieces. Transfer the chicken to a large mixing bowl.
- Add the salt, black pepper, paprika, garlic powder, onion powder, and cornstarch if using. Drizzle in the olive oil and toss until every piece is evenly coated. Let the chicken rest for 10 minutes
- In a separate bowl, whisk together the honey, soy sauce, garlic, vinegar, ketchup, sesame oil, black pepper, and chili flakes until well combined
- Heat a large skillet over medium-high heat. Add a little oil if needed. Arrange the chicken in a single layer and cook for 4–5 minutes without moving it. Flip and cook for another 4–5 minutes until nearly cooked through
- Reduce the heat to medium. Pour the prepared honey garlic glaze into the skillet and gently stir to coat the chicken
- Allow the sauce to simmer for 3–5 minutes, turning the chicken occasionally. The glaze will become thick, shiny, and coat the chicken evenly. If it thickens too much, stir in 1–2 tablespoons of water.
- Cook until the chicken reaches an internal temperature of 165°F (74°C). Garnish with sliced green onions and sesame seeds if desired. Serve immediately.
Notes
- Boneless chicken thighs stay extra juicy, while chicken breasts provide a leaner alternative.
- Drying the chicken before seasoning helps develop a better golden-brown crust.
- Avoid overcrowding the skillet to ensure the chicken browns instead of steaming
- Cornstarch is optional but creates a lightly crisp coating and helps the glaze adhere to the chicken.
- If the sauce reduces too quickly, add a splash of water and stir until smooth.
- If the sauce reduces too quickly, add a splash of water and stir until smooth.
Nutrition Facts
- Calories: 420kcal
- Fat: 21g
- Saturated Fat: 4g
- Cholesterol: 145mg
- Sodium: 780mg
- Potassium: 620mg
- Carbohydrates: 20g
- Fiber: 1g
- Sugar: 17g
- Protein: 36g