───────────────────────────────────────────
INGREDIENTS
───────────────────────────────────────────
For the shrimp:
• 1 kilogram (2.2 pounds) large raw shrimp (size 16–20 recommended)
• Cold water, as needed
• Ice, optional but helpful
For seasoning the shrimp:
• 1 teaspoon salt
• 1 teaspoon black pepper
• 1 teaspoon garlic powder
• 1 teaspoon paprika
• 1/2 teaspoon cayenne pepper (optional, for mild heat)
• 1 teaspoon lemon juice or vinegar
For the coating system:
Dry flour mixture:
• 1 1/2 cups all-purpose flour
• 1/2 cup cornstarch
• 1 teaspoon salt
• 1 teaspoon black pepper
• 1 teaspoon paprika
• 1/2 teaspoon baking powder
Wet batter:
• 1 cup cold water or cold milk
• 1 large egg
• 1/2 teaspoon salt
For frying:
• 1.5 to 2 liters neutral oil (vegetable, sunflower, or peanut oil)
Optional for serving:
• Lemon wedges
• Dipping sauces (cocktail sauce, tartar sauce, spicy mayo)
────────────────────────────────────────────
STEP 1: PREPARING THE SHRIMP
────────────────────────────────────────────
Start with raw shrimp. Avoid pre-cooked shrimp because they become rubbery when fried again.
- Peel the shrimp, leaving the tail on if desired for presentation.
- Devein the shrimp by making a shallow cut along the back and removing the dark vein.
- Rinse the shrimp briefly under cold running water to remove any residue.
- Pat the shrimp completely dry using paper towels. This step is critical. Excess moisture prevents crispiness.
If your kitchen is warm, place the cleaned shrimp in a bowl over ice while you prepare the seasoning.
────────────────────────────────────────────
STEP 2: SEASONING THE SHRIMP
────────────────────────────────────────────
Seasoning directly on the shrimp ensures flavor inside the crust.
- Place the dried shrimp in a large bowl.
- Add salt, black pepper, garlic powder, paprika, cayenne (if using), and lemon juice.
- Toss gently until every shrimp is evenly coated.
Let the shrimp rest for 10 minutes. This short marination enhances flavor without changing texture.
────────────────────────────────────────────
STEP 3: PREPARING THE COATING SYSTEM
────────────────────────────────────────────
This recipe uses a two-stage coating for maximum crispiness.
Dry flour mixture:
- In a wide bowl, combine flour, cornstarch, salt, black pepper, paprika, and baking powder.
- Whisk thoroughly to distribute ingredients evenly.
Wet batter:
- In another bowl, whisk the egg until smooth.
- Add cold water or milk and salt.
- Mix until fully combined. The batter should be thin enough to drip easily but thick enough to cling to the shrimp.
Cold batter is essential. It reacts better with hot oil and produces a crisp crust.
────────────────────────────────────────────
STEP 4: COATING THE SHRIMP
────────────────────────────────────────────
Set up an organized coating station:
• Bowl 1: Dry flour mixture
• Bowl 2: Wet batter
Coating process:
- Take one shrimp and lightly coat it in the dry flour mixture. Shake off excess.
- Dip it into the wet batter, fully coating it.
- Return it to the dry flour mixture and press gently to create a textured surface.
Place coated shrimp on a tray in a single layer. Do not stack.
Let the coated shrimp rest for 5 minutes. This helps the coating adhere better during frying.
────────────────────────────────────────────
STEP 5: HEATING THE OIL
────────────────────────────────────────────
Correct oil temperature is one of the most important steps.
- Pour oil into a deep pan or heavy pot, filling it no more than halfway.
- Heat the oil over medium-high heat until it reaches 175–180°C (350–360°F).
If you do not have a thermometer:
• Drop a small pinch of batter into the oil.
• If it sizzles immediately and floats to the surface, the oil is ready.
Oil that is too hot will burn the coating. Oil that is too cold will make the shrimp greasy.
────────────────────────────────────────────
STEP 6: FRYING THE SHRIMP
────────────────────────────────────────────
- Fry the shrimp in small batches. Overcrowding lowers oil temperature.
- Carefully lower shrimp into the oil, one at a time.
- Fry for 2 to 3 minutes per side, depending on size.
- Shrimp are done when they turn golden brown and float steadily.
Do not overcook. Shrimp cook very quickly and become tough if fried too long.
────────────────────────────────────────────
STEP 7: DRAINING AND RESTING
────────────────────────────────────────────
- Remove shrimp using a slotted spoon or wire skimmer.
- Place them on a wire rack or paper towels to drain excess oil.
Let them rest for 1 minute before serving. This allows the crust to set.
────────────────────────────────────────────
STEP 8: SERVING
────────────────────────────────────────────
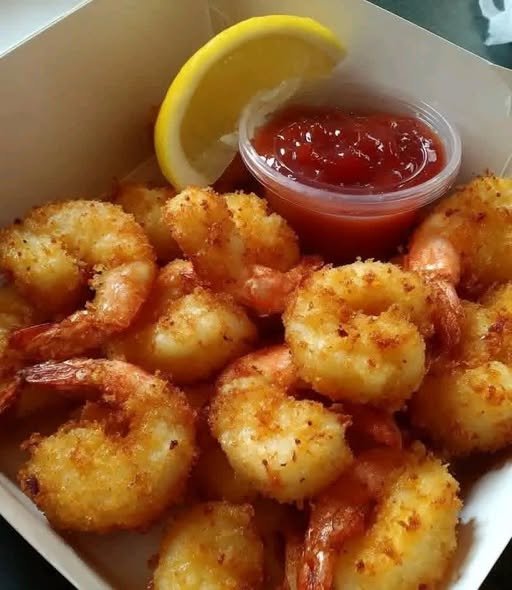
Serve immediately while hot and crispy.
Suggested pairings:
• Fresh lemon wedges
• Classic cocktail sauce
• Creamy tartar sauce
• Spicy mayo
• Coleslaw, fries, or a fresh salad
────────────────────────────────────────────
FINAL TIPS FOR PERFECT RESULTS
────────────────────────────────────────────
• Always start with dry shrimp
• Keep batter cold and oil hot
• Fry in small batches
• Do not skip the resting steps
• Serve immediately for best texture