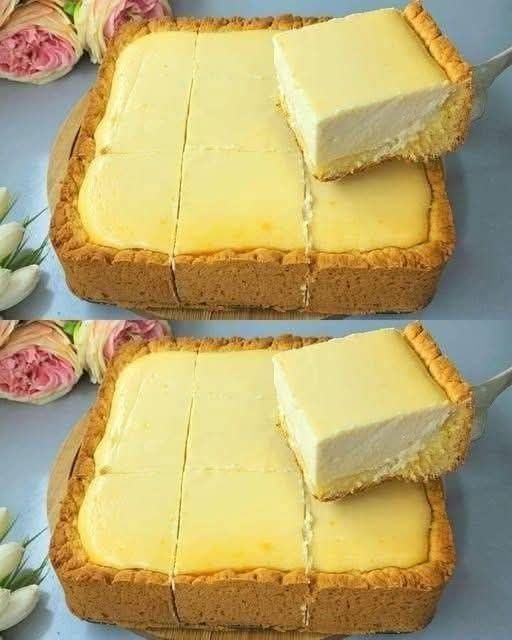
Torta della Nonna is one of the most beloved traditional desserts of Italy, especially associated with Tuscany. The name translates to “Grandmother’s Cake,” and it describes a beautiful homemade tart made with a delicate, buttery, crumbly pastry, a thick and silky vanilla-infused lemon custard, a golden pastry lid, toasted pine nuts, and a generous dusting of powdered sugar. Every slice brings together the richness of homemade pastry cream, the gentle fragrance of lemon zest, the sweetness of vanilla, and the delicate crunch of pine nuts, creating a dessert that feels both rustic and elegant. Although the tart looks impressive when presented on a cake stand, it is made from simple ingredients and traditional techniques that have been passed down through Italian home kitchens for generations. The secret to an excellent Torta della Nonna is to prepare a pastry that is tender rather than tough, a custard that is smooth rather than runny, and a pastry shell that bakes evenly while holding the filling securely inside. This extended recipe explains every stage in detail, from choosing ingredients and preparing the pastry to cooking the custard, assembling the tart, baking it to a beautiful golden finish, allowing it to cool properly, and serving it in the traditional Italian way.
Recipe overview
Preparation time: approximately 60–75 minutes, including preparing the pastry, making the custard, and assembling the tart.
Chilling time: approximately 1–2 hours for the pastry, plus additional cooling time for the custard if needed.
Baking time: approximately 40–50 minutes, depending on the oven, the thickness of the pastry, and the size of the tart tin.
Cooling time: approximately 3–4 hours before cutting, so that the custard sets and the slices hold their shape.
Total time: approximately 4–6 hours, including chilling, baking, and cooling.
Yield: 10–12 slices.
Difficulty: Intermediate, because the recipe involves making two separate preparations, preparing a filled pastry tart, and baking it without allowing the custard to become too loose.
Recommended tin: One round 24–26 cm tart tin, preferably with a removable base.
Oven temperature: 175°C in a conventional oven or approximately 165°C in a fan-assisted oven.
Ingredients for the traditional Torta della Nonna
Ingredients for the buttery shortcrust pastry
The pastry, known in Italian as pasta frolla, forms the foundation of this dessert. It should be tender, lightly sweet, buttery, and sturdy enough to contain the custard without becoming hard or excessively crumbly. Cold butter is particularly important because it helps create a delicate pastry texture, while gentle handling prevents the development of too much gluten.
- 500 g all-purpose flour, preferably plain flour with a moderate protein content.
- 200 g unsalted butter, cold and cut into small cubes.
- 180 g granulated sugar or superfine sugar.
- 2 large eggs.
- 2 large egg yolks.
- Finely grated zest of 1 unwaxed lemon.
- 1 teaspoon vanilla extract.
- 1 teaspoon baking powder, optional, for a slightly softer, more delicate pastry.
- A small pinch of salt.
The butter should be cold when it is mixed with the flour, but it should not be frozen solid. The eggs should be fresh, and the lemon should be washed and dried before grating the zest. Only the yellow outer layer of the lemon skin should be used, because the white pith underneath can contribute bitterness.
Traditional Italian pasta frolla recipes vary from family to family. Some use whole eggs, some use extra yolks, and some omit baking powder entirely. This version uses whole eggs and additional yolks to produce a pastry that is rich, easy to handle, and suitable for enclosing a substantial custard filling.
Ingredients for the rich Italian pastry cream
The filling is called crema pasticcera in Italian. It is a cooked custard made from milk, egg yolks, sugar, flour or starch, and aromatic ingredients. For Torta della Nonna, the custard should be thick enough to remain inside the tart after baking, but smooth enough to feel creamy and luxurious when eaten.
- 1 litre whole milk.
- 8 large egg yolks.
- 200 g granulated sugar.
- 80 g cornstarch or cornflour.
- 1 vanilla bean or 2 teaspoons pure vanilla extract.
- Finely grated zest of 1 unwaxed lemon.
- 30 g unsalted butter, optional, for additional richness.
- A small pinch of salt.
Whole milk produces a fuller flavour and a smoother mouthfeel than low-fat milk. The vanilla bean gives the custard a traditional appearance because the tiny black seeds become visible throughout the cream. If a vanilla bean is unavailable, good-quality vanilla extract works very well.
Cornstarch provides a smooth, stable custard, although some traditional Italian family recipes use plain flour or a combination of flour and starch. The amount specified here is intended to create a thick filling suitable for a closed tart that will be baked again in the oven.
Ingredients for the top of the tart
- 40–60 g pine nuts.
- 2–3 tablespoons powdered sugar, also called icing sugar or confectioners’ sugar.
- A little extra flour for rolling the pastry.
- A small amount of butter for greasing the tart tin, if the tin is not nonstick.
Pine nuts are the characteristic finishing ingredient in many traditional versions of Torta della Nonna. They provide a delicate nutty flavour and a lightly toasted aroma that complements the vanilla and lemon custard. If pine nuts are unavailable, the tart can still be made without them, although the flavour and appearance will be slightly different.
Step 1: Prepare your kitchen and ingredients
Before beginning the recipe, make sure that all the ingredients have been measured accurately and that the work surface is clean and dry. Preparing the ingredients in advance makes the process easier because the pastry and custard require different handling techniques.
Take the butter out of the refrigerator only when you are ready to make the pastry. Cold butter helps prevent the dough from becoming greasy and sticky. Measure the flour into a large mixing bowl, weigh the sugar, separate the eggs if necessary, and grate the lemon zest before beginning.
Prepare a round tart tin measuring approximately 24–26 cm across. If the tin has a removable base, it will be easier to remove the finished tart without damaging its sides. Lightly grease the tin with butter, paying particular attention to the corners where the base meets the sides.
Set aside a rolling pin, a whisk, a silicone spatula, a medium saucepan, a fine grater, a sieve, a piece of baking parchment, and a large sheet of plastic wrap or reusable food wrap for chilling the pastry.
The work area should not be excessively warm. Shortcrust pastry becomes difficult to handle if the butter begins to soften too much, especially when the dough is rolled into a large circle. If the kitchen is warm, work in short stages and return the dough to the refrigerator whenever it becomes sticky or soft.
Step 2: Combine the flour, sugar, salt, and lemon zest
Place the 500 g of flour in a large bowl. Add the 180 g of sugar, the pinch of salt, and the optional teaspoon of baking powder. Stir everything together until the ingredients are evenly distributed.
Add the finely grated lemon zest and rub it lightly into the flour and sugar with your fingertips. This helps disperse the lemon’s fragrant oils throughout the dry ingredients, allowing the finished pastry to have a gentle citrus aroma rather than concentrated patches of lemon flavour.
The lemon should complement the custard rather than overpower it. Torta della Nonna is traditionally a delicate dessert, and the most pleasing result is achieved when the buttery pastry, creamy vanilla filling, and citrus fragrance work together harmoniously.
If you prefer a more pronounced vanilla flavour, you can reserve some of the vanilla for the custard and use only a small amount in the pastry. If you enjoy a brighter citrus character, a little extra lemon zest can be added, but avoid adding lemon juice directly to the pastry because extra liquid can change its consistency.
Step 3: Rub the cold butter into the flour
Add the 200 g of cold butter cubes to the flour mixture. Using your fingertips, gently rub the butter into the flour until the mixture resembles coarse breadcrumbs with some small, pea-sized pieces remaining.
Work relatively quickly so that the butter does not become warm from your hands. You do not need to produce a perfectly uniform powder. Small pieces of butter can contribute to a delicate, tender pastry texture, provided they are distributed reasonably evenly throughout the mixture.
Alternatively, you can use a pastry cutter to work the butter into the flour. Avoid vigorously beating the mixture with an electric mixer for too long, because excessive mixing can soften the butter and make it harder to control the dough.
At this stage, the mixture should look pale and crumbly, with no large lumps of butter. If you notice that the butter is melting and the mixture is becoming greasy, place the bowl in the refrigerator for 10–15 minutes before continuing.
The purpose of this step is to coat the flour particles with fat. This limits gluten development when the eggs are added and helps the finished pastry remain tender rather than chewy.
Step 4: Add the eggs and form the pastry dough
Make a well in the centre of the flour and butter mixture. Add the 2 whole eggs, the 2 egg yolks, and the teaspoon of vanilla extract.
Using a fork or your fingertips, gently mix the eggs into the surrounding flour mixture until the ingredients begin to come together. Continue gathering the mixture into a dough, pressing loose crumbs together with your hands.
At first, the mixture may appear dry and uneven. This is normal. Continue pressing it gently until most of the loose flour has been incorporated. If a few dry crumbs remain, squeeze them into the dough rather than immediately adding extra liquid.
The dough should be soft but not sticky, cohesive but not elastic, and firm enough to hold its shape when pressed. If it is unusually dry because the flour absorbs more moisture than expected, add a teaspoon of cold milk or water at a time until it comes together. If it is excessively sticky, add a very small amount of flour or chill it before making any further adjustments.
Do not knead the dough as you would bread. Bread dough benefits from gluten development, but shortcrust pastry generally does not. Excessive kneading can produce a tough texture and cause the pastry to shrink during baking.
As soon as the dough forms a cohesive mass, stop mixing.
Step 5: Divide and chill the pastry
Place the dough on the work surface and divide it into two portions. Make one portion slightly larger than the other, approximately 60 percent for the base and sides and 40 percent for the top.
Shape each portion into a flat disc rather than a ball. Flat discs chill more evenly and are easier to roll later.
Wrap each disc securely and place it in the refrigerator for at least 60 minutes. If the dough is still very soft after chilling, leave it in the refrigerator for another 20–30 minutes.
Chilling performs several important functions. It firms the butter, makes the pastry easier to roll, allows the flour to absorb moisture, and relaxes the gluten that may have developed during mixing. This helps the pastry retain its shape in the oven.
The pastry can also be prepared a day ahead and refrigerated overnight. If it becomes very hard in the refrigerator, leave it at room temperature for approximately 5–10 minutes before rolling, checking frequently so that it does not become soft and greasy.
Step 6: Begin preparing the vanilla and lemon custard
While the pastry chills, prepare the crema pasticcera.
Pour the 1 litre of whole milk into a medium saucepan. If using a vanilla bean, split it lengthwise with a small knife and scrape out the seeds. Add both the seeds and the pod to the milk.
Add the finely grated zest of 1 lemon. Place the saucepan over medium-low heat and warm the milk slowly, stirring occasionally to prevent a skin from forming on the surface.
The milk should become hot and fragrant, with gentle steam rising from the surface. It does not need to boil vigorously. Once it approaches a gentle simmer, remove the saucepan from the heat and allow the vanilla and lemon to infuse for approximately 10 minutes.
If you are using vanilla extract rather than a vanilla bean, you can add it later, after the custard has thickened. This helps preserve its aroma.
Warming the milk with the aromatic ingredients gives the custard a deeper, more rounded flavour. The lemon zest contributes freshness, while the vanilla provides the sweet, creamy fragrance associated with traditional Italian pastry cream.
Step 7: Whisk the egg yolks and sugar
Place the 8 egg yolks in a large heatproof bowl. Add the 200 g of sugar and whisk until the mixture becomes smooth, slightly paler, and evenly combined.
There is no need to whisk until the mixture becomes extremely thick or forms ribbons. The aim is simply to dissolve much of the sugar into the yolks and produce a smooth base for the custard.
Add the 80 g of cornstarch and the small pinch of salt. Whisk thoroughly until there are no dry pockets of starch and the mixture looks smooth.
If the mixture becomes very thick, do not worry. A small amount of warm milk will loosen it in the next stage.
It is important to combine the starch thoroughly with the egg yolks before adding the hot milk. This reduces the likelihood of lumps forming and helps the custard thicken evenly during cooking.
Step 8: Temper the egg mixture with the warm milk
If you used a vanilla bean, remove the pod from the warm milk. You may strain out the lemon zest if you prefer a completely smooth custard, although leaving the zest in gives the cream a more pronounced lemon aroma.
Pour a small amount of the warm milk into the egg mixture while whisking continuously. Begin with approximately 100–150 ml and whisk until the mixture becomes loose and smooth.
Gradually add another portion of the warm milk, continuing to whisk as you pour. Once the egg mixture has warmed up, slowly incorporate the remaining milk.
This process is called tempering. It raises the temperature of the egg yolks gradually, reducing the risk that they will coagulate suddenly when exposed to hot liquid.
Do not pour all the hot milk into the yolks at once without whisking, because this can create cooked egg particles that are difficult to remove completely.
Once all the milk has been incorporated, the mixture should be fluid, creamy, and evenly coloured.
Step 9: Cook the custard until thick and glossy
Pour the entire mixture back into the saucepan. Place it over medium-low to medium heat and whisk continuously, paying particular attention to the bottom and corners of the pan.
During the first few minutes, the mixture may remain thin and liquid. As it heats, the starch begins to gelatinise and the egg yolks contribute to the custard’s structure. The mixture will gradually become thicker.
Continue whisking steadily. As the custard thickens, you may notice that the whisk leaves visible tracks across the surface. Keep moving the whisk so that no portion remains stationary long enough to scorch.
When the custard reaches a thick consistency and begins to produce slow bubbles, continue cooking and whisking for approximately 30–60 seconds, provided the mixture remains smooth and does not scorch. This helps ensure that the starch is properly cooked.
Remove the saucepan from the heat. If you used vanilla extract, stir it in now. Add the optional 30 g of butter and whisk until completely incorporated.
The finished custard should be smooth, rich, and thick enough to hold a soft mound on a spoon. It will become firmer as it cools.
If small lumps have formed, immediately pass the hot custard through a fine-mesh sieve into a clean bowl. Press it through gently with a spatula rather than forcing large lumps through the mesh.
Do not allow the custard to boil aggressively for an extended period. Excessive heat can affect its texture, while insufficient cooking can leave the starch undercooked and the filling too loose.
Step 10: Cool the custard safely
Transfer the custard to a shallow, heatproof container. Spread it into an even layer to help it cool more quickly.
Press food-safe plastic wrap directly onto the surface of the custard. This prevents a thick skin from forming as the custard cools.
Allow it to cool briefly, then refrigerate promptly. Avoid leaving the custard at room temperature for more than two hours, or more than one hour in very hot conditions.
Chill until the custard is cool and firm enough to spread, generally around 45–90 minutes depending on the depth of the container and the temperature of the refrigerator.
Before assembling the tart, stir the chilled custard gently until it becomes smooth and spreadable. Do not beat it excessively, because incorporating too much air is unnecessary.
The filling should be thick and creamy, not runny. If it is still warm, allow it to cool further before putting it into the pastry shell. Warm custard can soften the butter in the raw pastry, making the tart more difficult to assemble and increasing the risk of a soggy base.
Step 11: Prepare the pastry for rolling
Remove the larger disc of pastry from the refrigerator. Place it on a lightly floured work surface.
If the dough is very firm, allow it to soften for several minutes until it can be rolled without cracking. If it becomes sticky, chill it again briefly.
Lightly flour the rolling pin and the top of the dough. Begin rolling from the centre outward, rotating the pastry a quarter turn after each few strokes to maintain an even circular shape.
Roll the pastry to approximately 3–4 mm thick. The circle should be large enough to cover the base of the tart tin and extend up the sides with a little extra pastry around the rim.
Try to keep the thickness consistent. Very thin areas can tear or become soggy under the filling, while very thick areas may remain underbaked or feel heavy when eaten.
If the pastry cracks around the edges, press the cracks together gently with your fingertips. Shortcrust pastry is forgiving, and small imperfections can usually be repaired without affecting the final result.
Step 12: Line the tart tin
Carefully lift the rolled pastry and place it into the prepared tart tin. One way to do this is to roll the pastry loosely around the rolling pin and then unroll it over the tin.
Gently ease the pastry into the base and corners without stretching it. Stretching the dough to fit can cause it to shrink during baking.
Press the pastry lightly against the base and sides, ensuring that it reaches the junction between the bottom and the wall of the tin. Avoid trapping large air pockets underneath.
Allow a small amount of pastry to extend above the rim. This extra edge can be trimmed after the top has been fitted.
If a small tear appears, patch it with a piece of leftover pastry, pressing the edges together gently. Make sure the patch is not excessively thick.
Place the lined tin in the refrigerator for approximately 15–20 minutes while you prepare the remaining pastry. This brief rest firms the butter again and helps the shell maintain its shape during baking.
Step 13: Add the custard filling
Remove the lined tart tin from the refrigerator. Stir the cooled custard gently until smooth, then spoon it into the pastry shell.
Spread the custard evenly with a spatula, moving from the centre toward the edges. The filling should reach a reasonably level surface while leaving enough room for the pastry lid.
Avoid filling the shell all the way to the very top. A small amount of space beneath the lid helps prevent the filling from pressing against the pastry edges as the tart bakes.
The custard should be cool, thick, and stable. If it has become too firm to spread easily, gently stir it until smooth. Do not add extra milk merely to make it easier to spread, because this can weaken the filling and cause it to become loose after baking.
Smooth the top carefully. A level filling helps the upper pastry rest evenly and gives the finished tart a neat cross-section when sliced.
Step 14: Roll the top pastry
Take the smaller disc of chilled pastry from the refrigerator. Roll it on a lightly floured work surface into a circle slightly larger than the opening of the tart tin.
Aim for a thickness of approximately 3 mm. The top should be thin enough to bake through evenly but strong enough to cover the custard without tearing.
If the pastry cracks while rolling, allow it to soften briefly and press the cracks together. If it becomes too warm, return it to the refrigerator for a few minutes.
To transfer the pastry, roll it gently around the rolling pin and unroll it over the filled tart. Alternatively, roll it between two sheets of baking parchment and use the parchment to support it during transfer.
Centre the pastry carefully so that it covers the filling completely and overlaps the pastry rim.
Work gently because the lid does not need to be pulled tight over the custard. A relaxed pastry cover is less likely to tear and is easier to seal around the edges.
Step 15: Seal the tart carefully
Press the top pastry lightly against the pastry lining around the rim of the tin. Use your fingertips to join the upper and lower pastry layers together.
Trim away the excess dough with a small sharp knife. You can press the edges with the back of a fork or pinch them gently between your fingers to produce a simple decorative finish.
Check the entire circumference of the tart. Any unsealed gaps can allow custard to escape during baking, especially if the filling expands slightly or the pastry becomes soft.
If the pastry feels warm or floppy, place the assembled tart in the refrigerator for 15–20 minutes before baking. This extra chilling step is especially helpful in a warm kitchen.
The upper layer should sit neatly over the custard, with the edges firmly joined. There is no need to cut a large opening in the top, because the tart is designed as a closed pastry shell.
Step 16: Prepare the pine nuts
Measure out approximately 40–60 g of pine nuts. Spread them evenly over the top of the pastry.
Press them very gently into the dough so that they adhere during baking. Avoid pressing them deeply into the pastry, because this can create uneven depressions on the surface.
Distribute the pine nuts from the centre toward the edges, leaving a few small spaces between them. A generous but even covering produces the classic appearance of Torta della Nonna.
There is no need to toast the pine nuts beforehand. They will toast naturally as the tart bakes, developing a delicate golden colour and a pleasant nutty aroma.
Pine nuts can brown quickly if exposed to excessive heat, so keep an eye on the tart during the later stages of baking. If the nuts are becoming too dark while the pastry remains pale, loosely cover the top with aluminium foil.
Step 17: Preheat the oven properly
Preheat the oven to 175°C for a conventional oven or approximately 165°C for a fan-assisted oven.
Allow the oven enough time to reach the correct temperature before putting the tart inside. An adequately preheated oven encourages the pastry to begin setting promptly and helps it bake evenly.
Place an oven rack in the middle or slightly lower-middle position. This is often a good position for a filled tart because it allows the pastry base to cook thoroughly while the upper surface becomes golden.
If your oven tends to brown the top quickly while leaving pastry bases pale, use the lower-middle rack. If your oven has strong heat from below, the middle rack may be more suitable.
Oven temperatures vary, so the suggested temperature should be treated as a starting point rather than an absolute guarantee. The visual signs of doneness are just as important as the time.
Step 18: Bake the Torta della Nonna
Place the assembled tart on the oven rack. Bake for approximately 40–50 minutes, checking its appearance after the first 30 minutes.
During baking, the pastry will gradually change from pale cream to a light golden colour. The pine nuts should become lightly toasted, and the edges should appear firm and well set.
The surface may develop a few small cracks, which is not necessarily a problem. Homemade shortcrust pastry can expand and settle slightly as the butter melts and the dough firms.
Avoid opening the oven repeatedly during the first 25–30 minutes, because sudden temperature changes can interfere with even baking.
If the top is becoming too dark before the pastry appears fully cooked, loosely cover the tart with aluminium foil and continue baking. Do not press the foil against the pine nuts or pastry.
The tart is ready when the pastry is evenly golden, the sides are firm, and the top no longer looks raw or wet. The custard inside should be set rather than liquid, although it will remain softer while hot.
If your tin is particularly deep or your oven runs cool, the tart may need additional baking time. If your oven runs hot, it may finish earlier. Use the colour and structure of the pastry as your main guides.
Step 19: Remove the tart from the oven
Once the pastry is golden and baked through, remove the tart carefully from the oven and place it on a heatproof surface or cooling rack.
Allow it to remain in the tin for at least 30–45 minutes. The pastry is delicate while hot, and the custard needs time to settle into a stable structure.
Do not immediately remove the sides of a springform or removable-base tin while the tart is extremely hot. Moving it too early can cause the pastry to crack or the filling to shift.
As the tart cools, the custard becomes firmer and the butter in the pastry solidifies. These changes make it easier to handle and improve the final texture.
A warm Torta della Nonna may smell wonderfully fragrant, but it will not yet have its ideal sliceable consistency. Patience during cooling is one of the most important parts of the recipe.
Step 20: Cool completely before decorating
After the initial cooling period, carefully remove the tart from the tin if the pastry has become sufficiently firm. If it still feels fragile, allow it to cool longer.
Transfer it to a serving plate or cake stand. Leave it until it reaches room temperature, then refrigerate it if necessary to allow the custard to become fully set.
For the cleanest slices, allow approximately 3–4 hours of total cooling after baking, adjusting as needed for the temperature of the kitchen and the thickness of the filling.
Do not dust the tart with powdered sugar while it is hot. Heat and moisture will dissolve the sugar, creating a patchy appearance rather than a delicate white finish.
The pine nuts should remain visible against the golden pastry, and the lemon and vanilla aromas should be noticeable without being overpowering.
Step 21: Finish with powdered sugar
Just before serving, place 2–3 tablespoons of powdered sugar in a small sieve.
Hold the sieve above the tart and tap it gently to distribute a fine layer of sugar across the top. You can leave some of the toasted pine nuts visible for a traditional rustic appearance.
The powdered sugar provides a soft sweetness and a beautiful contrast with the golden pastry. It also gives the tart the classic appearance often seen in Italian bakeries.
Avoid using too much sugar, because the custard and pastry already contain a substantial amount of sweetness. A light, even dusting is usually sufficient.
If the tart has been refrigerated, allow it to sit at room temperature for approximately 15–25 minutes before serving, provided it remains within safe food-handling conditions. This softens the pastry slightly and allows the vanilla and lemon flavours to become more noticeable.
Step 22: Slice and serve the traditional Italian tart
Use a sharp knife to cut the tart into 10–12 slices. For cleaner cuts, wipe the knife between slices and use a gentle sawing motion rather than pressing down too forcefully.
The first cut should reveal three distinct elements: a golden pastry base, a generous layer of pale yellow custard, and a pastry lid topped with toasted pine nuts.
The pastry should be tender enough to break easily with a fork while still holding the filling securely. The custard should feel smooth, rich, and creamy, with a gentle lemon fragrance and a warm vanilla flavour.
Torta della Nonna can be served on its own, accompanied by a cup of espresso, a cappuccino, or unsweetened tea. Fresh berries can be offered on the side, although they are not necessary for a traditional presentation.
For an elegant dessert course, place each slice on a plain white plate and add only a small additional dusting of powdered sugar if needed. The tart is already rich in flavour, so it does not require a heavy sauce or elaborate decoration.
The secrets to making the best Torta della Nonna
The pastry must remain cool
The most common difficulty when making pasta frolla is handling it while the butter becomes too warm. Warm dough sticks to the rolling pin, tears more easily, and may shrink during baking.
Keep the pastry refrigerated between stages, work quickly, and use only enough flour to prevent sticking. Excessive flour can make the pastry dry and tough, so brush away any unnecessary flour before fitting the dough into the tin.
The custard must be thick enough
A loose custard can make the base soggy and cause the tart to collapse when sliced. Cooking the custard until it is visibly thick and allowing it to cool completely before assembly are essential steps.
If the custard appears thin while it is still hot, remember that it will firm up as it cools. However, if it remains runny after refrigeration, it may not have been cooked sufficiently or the ingredient measurements may have been inaccurate.
Avoid overworking the dough
Once the pastry ingredients have come together, stop mixing. Overworking the dough develops gluten, which can make the crust tough and encourage it to shrink in the oven.
A tender pastry is one of the defining characteristics of an excellent Italian custard tart.
Do not skip chilling
Chilling is not merely a convenience. It improves the pastry’s handling qualities, helps the butter remain firm, and reduces shrinking.
The first chilling period develops the dough, while the shorter chilling period after lining the tin helps the pastry retain its shape. Chilling the completed tart before baking can also improve the final result.
Use the right amount of lemon
Lemon is an important aromatic ingredient, but it should not overwhelm the vanilla custard. Freshly grated zest is generally preferable to bottled lemon flavouring.
Avoid adding large quantities of lemon juice to the custard unless you are deliberately adapting the recipe, because the additional liquid and acidity can alter its texture.
Bake until the pastry is genuinely golden
A pale tart may look finished on top while the bottom pastry remains underbaked. Give the tart enough time in the oven for the sides and base to develop a light golden colour.
A metal tart tin usually transfers heat effectively and helps the base bake well. A thick ceramic dish may require additional time.
Allow enough cooling time
Cutting the tart too soon is one of the easiest ways to ruin an otherwise successful result. The custard is softer when hot, and the pastry is more fragile.
Cooling gives the filling time to stabilise and allows the butter in the pastry to firm up. For the best presentation, wait until the tart is completely cool before slicing.
Common mistakes and how to fix them
If the pastry is too sticky: Wrap it and refrigerate it for 20–30 minutes. If necessary, dust the work surface very lightly with flour. Avoid adding large quantities of extra flour.
If the pastry cracks while rolling: Allow it to soften slightly and press the cracks together with your fingers. If a section breaks, patch it with a small piece of dough and smooth the join.
If the pastry shrinks in the oven: It may have been stretched while lining the tin, overworked during mixing, or baked without sufficient chilling. Next time, ease the pastry naturally into the corners and chill it before baking.
If the custard contains lumps: Remove it from the heat and pass it through a fine-mesh sieve while it is still warm. Whisking continuously during cooking also helps prevent lumps.
If the custard is too thin: Return it to the saucepan and heat it gently while whisking until it thickens. If it has already been assembled into the tart, it is harder to correct, so make sure the filling is properly cooked and chilled beforehand.
If the top browns too quickly: Reduce the oven temperature slightly if necessary and loosely cover the tart with aluminium foil. Continue baking until the pastry is cooked through.
If the bottom pastry is soggy: The custard may have been too warm or too loose, the pastry may have been rolled too thin, or the tart may have been removed from the oven too early. Use cooled custard, maintain an even pastry thickness, and bake until the shell is golden.
If the tart falls apart during slicing: It may still be warm, or the filling may not have set sufficiently. Chill it longer and use a sharp knife, cleaning the blade between cuts.
Storage instructions
Because Torta della Nonna contains milk and eggs, it should be handled as a perishable dessert.
Once the tart has cooled, cover it and refrigerate it within two hours of baking, or within one hour if the surrounding temperature is above 32°C. Store it in the refrigerator at 4°C or below.
For the best flavour and texture, enjoy it within approximately 3 days. It may remain acceptable for longer under suitable refrigeration, but the pastry can gradually soften as it absorbs moisture from the custard.
The tart can be served chilled or allowed to stand briefly at room temperature before serving. Do not leave it unrefrigerated for extended periods.
Freezing is possible, but it may affect the texture of the custard and make the pastry less crisp after thawing. If you decide to freeze it, wrap individual portions securely, freeze promptly, and thaw them in the refrigerator. Avoid repeated freezing and thawing.
Variations on the traditional recipe
Torta della Nonna with extra vanilla
For a more pronounced vanilla flavour, use a whole vanilla bean in the milk and a small amount of vanilla extract in the finished custard. The result will have a deep, fragrant aroma that pairs beautifully with the buttery pastry.
Torta della Nonna with a stronger lemon fragrance
Add a little extra finely grated lemon zest to the pastry and custard. Keep the quantity moderate so that the dessert remains creamy and balanced rather than tasting sharply citrusy.
Torta della Nonna with a lighter pastry
Omit the optional baking powder if you prefer a more traditional, firm shortcrust. Alternatively, replace a small portion of the all-purpose flour with pastry flour to produce a more delicate crumb.
Torta della Nonna without pine nuts
If pine nuts are unavailable or unsuitable, leave them off the top and finish the tart with powdered sugar. This is a practical adaptation, although pine nuts contribute the classic flavour and appearance associated with many versions of the dessert.
Individual Torta della Nonna tarts
The recipe can be adapted for small tart tins. Divide the pastry and custard among the tins, maintaining a similar pastry thickness and avoiding overfilling. Smaller tarts will generally bake more quickly, so begin checking them earlier than the full-size tart.
A slightly less sweet version
You can reduce the sugar in the pastry cream modestly, for example from 200 g to 160–175 g, depending on your taste. Keep in mind that sugar affects flavour and contributes to the overall balance of the custard, so very large reductions may change the character of the dessert.
Frequently asked questions
Can I prepare Torta della Nonna the day before serving?
Yes. In fact, preparing it the day before can be convenient because the custard has time to settle and the flavours have time to develop. Allow the tart to cool, refrigerate it in a covered container, and add the powdered sugar shortly before serving.
Can I use store-bought pastry?
Yes, although the result will differ from the traditional homemade version. A good-quality sweet shortcrust pastry can save time, but homemade pasta frolla generally gives the tart a more distinctive buttery flavour and texture.
Can I use plain flour instead of cornstarch in the custard?
Yes, traditional pastry cream can be thickened with flour, but the quantity and cooking time may need adjustment. Cornstarch usually produces a smoother, more delicate custard, while flour can give it a slightly heavier texture.
Why is my custard yellow?
The colour comes primarily from the egg yolks. The shade depends on the eggs used, so some custards are pale yellow while others have a deeper golden colour.
Should the custard be completely firm before baking?
It should be cool and thick enough to spread, but it does not need to be as firm as a fully chilled pudding. The custard will cook further inside the tart and will become firmer as the whole dessert cools.
Can I omit the lemon zest?
Yes. The tart will still be delicious with vanilla alone, although the lemon contributes a fresh aroma that balances the butter and sweetness.
Can I use salted butter?
Yes, but omit the additional pinch of salt or reduce it substantially. Unsalted butter gives you more control over the final flavour.
How do I know whether the tart is ready?
Look for golden pastry, firm edges, and a surface that no longer appears raw. The exact baking time depends on the oven and tart tin, so use the visual signs as well as the suggested 40–50 minutes.
Why is my pastry hard instead of tender?
The dough may have been overworked, too much flour may have been added during rolling, or the pastry may have been baked for too long. Mix only until the dough comes together and keep the rolling process gentle.
Can I make the tart without eggs?
This particular traditional recipe relies on eggs for both its pastry and custard. An egg-free adaptation is possible using a different pastry formula and a starch-thickened filling, but it will not have exactly the same flavour or texture.
Final serving recommendation
For the most satisfying Torta della Nonna, serve a moderately thick slice at a cool room temperature, with the custard fully set, the pastry tender, and the pine nuts lightly toasted. The first impression should be the delicate fragrance of vanilla and lemon, followed by the rich creaminess of the filling and the buttery crispness of the crust. A light dusting of powdered sugar completes the presentation without hiding the beautiful golden surface.
The true charm of Torta della Nonna lies in its simplicity. It does not need complicated decorations, colourful toppings, or elaborate sauces. Good butter, fresh eggs, whole milk, fragrant lemon zest, real vanilla, properly prepared pastry, and a carefully cooked custard are enough to create a dessert that feels generous, comforting, and unmistakably Italian. Take your time with the chilling, cook the custard patiently, bake until the pastry is golden, and allow the tart to cool completely before cutting it. These small details make the difference between an ordinary custard tart and a beautiful homemade Torta della Nonna worthy of sharing with family and friends.