Homemade milk kefir is a fermented drink made by combining dairy milk with milk kefir grains. The grains contain a natural mix of beneficial bacteria and yeast that transform ordinary milk into a tangy, lightly cultured drink. The finished kefir has a thinner texture than yogurt and can have a gentle fizz depending on how long it ferments.
Making kefir at home is quite simple because it does not require special fermentation equipment. A clean glass jar, milk, kefir grains, and a breathable cover are enough to get started. Once the grains are active, you can use them again and again to prepare fresh batches. This makes homemade kefir an easy addition to a regular kitchen routine.
Why Make Kefir at Home?
One reason people enjoy making milk kefir at home is that the process gives you control over the ingredients. You know exactly which milk you are using and can decide how long the kefir ferments. The longer fermentation time usually produces a stronger tang, while a shorter fermentation gives a milder flavor.
Kefir is also useful in many everyday meals and drinks. It can be enjoyed cold on its own, added to smoothies, poured over breakfast foods, or used in recipes that call for a cultured dairy ingredient. Its slightly sour flavor works well with both sweet and savory foods.
Ingredients You Need
This homemade kefir recipe uses only two main ingredients: whole dairy milk and activated milk kefir grains. The simplicity of the ingredient list is one of the reasons milk kefir is convenient to prepare at home. There is no need for added sugar, flavoring, or special starter powder.
For the milk, use pasteurized dairy milk. Cow’s milk is a common choice, but goat’s or sheep’s milk can also be used. The important point is to avoid ultra-pasteurized or UHT milk when possible because the high-temperature processing can make fermentation less reliable and may result in a thinner finished kefir.
Choosing the Right Milk
Whole dairy milk gives the homemade kefir a pleasant body and mild creaminess. Pasteurized milk is preferred because it has been heat-treated while still remaining suitable for fermentation with active kefir grains. If you regularly make kefir, using the same type of milk can also make it easier to recognize how your grains are behaving from batch to batch.
Ultra-pasteurized milk is treated at a much higher temperature than regular pasteurized milk. Some kefir grains may struggle to ferment it as effectively. If your kefir repeatedly stays very thin or does not develop its usual sour smell and taste, the type of milk can be one factor worth checking.
Understanding Kefir Grains
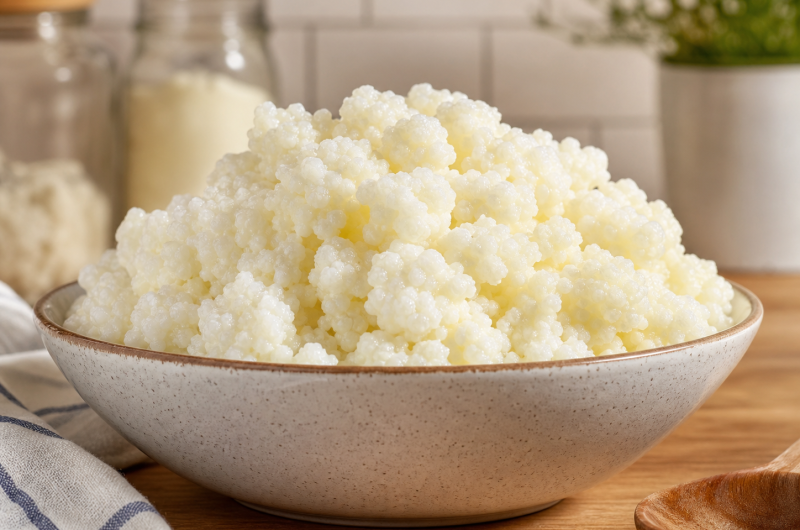
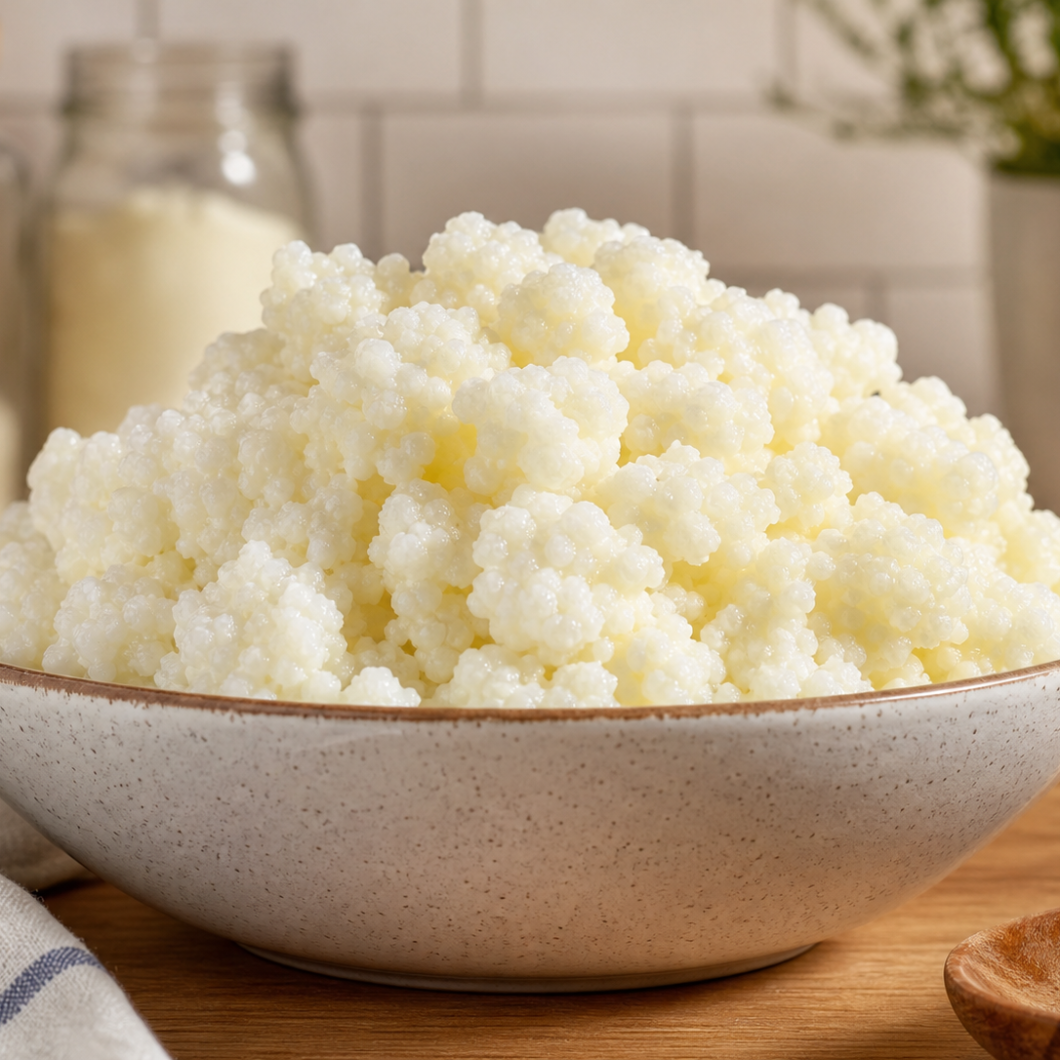
Milk kefir grains are not grains like rice or wheat. They are soft clusters made up of bacteria and yeast living together in a natural culture. They may look somewhat like small pieces of cauliflower, cottage cheese, or tapioca. Once active, these grains are added to milk where they begin the fermentation process.
During fermentation, bacteria use lactose, the naturally occurring sugar in milk, and produce lactic acid. This is responsible for the characteristic sour taste of kefir. Yeasts also take part in the process and can create small amounts of carbon dioxide, which may give properly fermented kefir a light sparkling quality.
How Kefir Grains Work
The grains are reusable, which means you do not need a new package of starter for every batch. After the milk has fermented, the grains are strained out and placed into fresh milk. With regular feeding, active kefir grains can continue to be used for many batches and may gradually increase in size and quantity.
The activity of kefir grains can vary depending on temperature, milk, grain health, and fermentation time. A batch made in a warm kitchen may ferment more quickly than one made in a cooler room. For this reason, the texture and flavor are better guides than the clock alone.
Preparing the Jar
A clean quart-size glass jar is all you need for this recipe. Wash the jar thoroughly before beginning and allow it to dry. A dishwasher-clean jar is suitable for everyday kefir making; there is no need to treat the process like home canning or completely sterilize every piece of equipment.
Clean equipment helps keep unwanted contaminants away from the milk while the kefir cultures are working. Use a jar that is large enough to hold the milk with some room at the top. Avoid filling the jar completely because fermented liquids can develop a small amount of gas.
Why Kefir Needs a Breathable Cover
Kefir is normally covered with a coffee filter, cheesecloth, light cloth, or paper towel rather than sealed tightly during fermentation. The cover keeps dust and other unwanted particles out while allowing gases produced during fermentation to escape.
Secure the cover with a canning lid ring or rubber band so it stays in place. There is no need to shake the jar during fermentation. Once the milk and grains have been combined, simply leave the jar in a suitable spot at room temperature and allow the culture to work.
How to Make Homemade Kefir
Start by placing the activated milk kefir grains into a clean, dry quart-size glass jar. Add the four cups of whole dairy milk and gently stir the mixture. The goal is simply to distribute the grains through the milk without aggressively mixing or shaking the jar.
Cover the opening with your chosen breathable material and secure it firmly. Leave the jar at room temperature, ideally around 68–75°F, for 12 to 48 hours. The exact time depends on your kitchen temperature and how mild or tangy you want the finished kefir to taste.
When Is Kefir Ready?
The milk kefir is ready when it has thickened slightly and developed a pleasantly sour smell. It may still look pourable, but the texture should be different from the fresh milk you started with. You may also notice that the milk has separated slightly, especially if it has fermented for a longer period.
A 12-hour fermentation generally produces a milder result, while fermentation closer to 48 hours can create a stronger sour flavor and thicker texture. Avoid judging the batch only by a specific number of hours because room temperature can change the speed of fermentation.
Straining the Finished Kefir
Once the milk has fermented to your liking, strain the kefir to separate the reusable grains from the finished drink. A fine-mesh strainer works well. If you prefer to avoid reactive metals, use plastic, silicone, nylon, or another suitable non-reactive kitchen tool.
Stainless steel is generally suitable for brief contact with kefir grains and is commonly used for straining. The main concern traditionally associated with metal is reactive materials such as aluminum or copper, which may interact with acidic foods. For regular home use, choose a clean, practical strainer that is easy to handle.
Storing Homemade Kefir
Transfer the strained kefir to a clean container and refrigerate it. Chilling slows the fermentation process and gives the drink a refreshing texture. Homemade milk kefir can generally be kept in the refrigerator for about one to two weeks, although the flavor may continue to become slightly more pronounced during storage.
Keep the finished kefir refrigerated and use clean utensils whenever you serve it. If the appearance, smell, or flavor seems clearly unpleasant or unusual rather than simply tangy, it is better not to consume it.
Reusing the Kefir Grains
The strained kefir grains can be placed directly into another batch of fresh milk. This makes the process continuous: ferment the milk, strain the grains, and use them again. With regular feeding, healthy kefir grains can remain active for a long time.
If you are not ready to make another batch immediately, the grains can be stored in the refrigerator in a small amount of milk. When you want to start fermenting again, follow your usual feeding routine and allow the grains time to become active.
Kefir vs. Yogurt
Kefir and yogurt are both fermented dairy foods, but they are made with different cultures and have noticeable differences in texture and flavor. Yogurt is usually thicker, creamier, and smoother, while milk kefir tends to be thinner and more drinkable.
Kefir can also have a sharper or slightly yeasty taste. Some batches may develop a gentle fizz because of the activity of the yeast in the kefir culture. Yogurt generally has a cleaner, creamy sourness without the same level of natural carbonation.
Probiotics in Kefir
Milk kefir is valued for its live cultures, including a variety of bacteria and yeast. The exact microorganisms present can differ depending on the kefir grains and fermentation conditions. This is one reason homemade kefir can vary slightly from one batch to another.
Kefir is often described as containing a broader range of microorganisms than traditional yogurt, although the exact amount and variety depend on the culture used. Fermentation also reduces some of the lactose in milk, which is why some people find kefir easier to tolerate than regular milk.
Starting With a Small Amount
If you are new to kefir, there is no need to drink a large serving right away. Start with a small amount and see how your body responds. You can gradually increase the amount if it suits you.
Everyone responds differently to fermented foods, especially when they are introduced into a regular diet. If you have a known dairy allergy, food sensitivity, digestive condition, or another health concern, speak with a qualified healthcare professional before adding homemade fermented dairy products to your diet.
Keeping the Fermentation Consistent
Consistency becomes easier once you learn how your kefir grains behave in your kitchen. Temperature, milk type, grain quantity, and fermentation time can all affect the final drink. If one batch is too mild, you can allow the next batch to ferment longer.
Likewise, if the kefir becomes much too sour for your taste, shorten the fermentation period. The goal is not to follow the clock blindly but to learn the signs of a properly fermented batch and adjust the process to suit your preference.
FAQs
Can I use goat or sheep milk?
Yes. The recipe can be made with cow, goat, or sheep’s milk. The texture and flavor may differ slightly between milk types, but active milk kefir grains can be used with dairy milk suitable for fermentation.
How long should milk kefir ferment?
Milk kefir can ferment for 12 to 48 hours at room temperature. A shorter period produces a milder flavor, while a longer fermentation usually gives a more pronounced tang. Temperature also affects how quickly the milk changes.
Does kefir need to be shaken?
No. Once the milk and kefir grains are combined, the jar can remain undisturbed during fermentation. There is no need to shake or stir it throughout the process.
Helpful Equipment Choices
A clean quart-size glass jar is the main piece of equipment required. For covering the jar, a coffee filter, cheesecloth, or light cloth works well. A rubber band or canning lid ring can keep the cover secure during fermentation.
For straining, plastic, silicone, nylon, or stainless-steel tools can be used. If you want to be especially cautious with your kefir grains, choose non-reactive materials. The most important part is keeping all equipment clean and easy to use.
Serving Homemade Milk Kefir
Chilled kefir is ready to drink as soon as it has been strained and refrigerated. Its naturally tangy flavor can be enjoyed plain, especially if you prefer cultured dairy drinks with a sharper taste. It can also be incorporated into breakfast or blended into other foods and drinks.
Because this recipe produces eight servings, you can prepare a batch and keep it chilled for use throughout the week. The grains can continue working in a fresh batch while the finished kefir stays in the refrigerator, making this a practical routine for regular homemade fermentation.
Healthy Homemade Milk Kefir
Homemade milk kefir is a simple fermented dairy drink made with whole pasteurized milk and activated milk kefir grains. It has a naturally tangy flavor and a smooth, drinkable texture. The grains can be strained out and reused for another batch.
8
servings10
minutes24
hours75
kcal24
hours10
minutesIngredients
4 cups whole dairy milk, preferably pasteurized rather than ultra-pasteurized
1–2 teaspoons activated milk kefir grains
Directions
- Add the activated milk kefir grains to a clean, dry quart-size glass jar. Pour in the four cups of whole dairy milk and gently stir to combine. Cover the jar with a coffee filter, cheesecloth, light cloth, or paper towel. Secure the covering with a canning lid ring or rubber band.
- Leave the jar at room temperature, ideally between 68–75°F, for 12 to 48 hours. Let it sit undisturbed without shaking or stirring. Check the kefir when it has thickened slightly and developed a pleasantly sour smell. Strain the finished kefir to remove the grains.
- Transfer the strained kefir to the refrigerator and serve chilled. The finished kefir can generally be kept refrigerated for about 1–2 weeks.
- Reuse the strained kefir grains immediately in fresh milk, or keep them refrigerated in a small amount of milk if you are not making another batch right away.
Notes
- This recipe is provided for general food information and is not medical advice. If you have a dairy allergy, food sensitivity, digestive concern, weakened immune system, or another medical condition, ask your healthcare professional whether homemade fermented dairy foods are appropriate for you.
Nutrition Facts
- Calories: 75kcal
- Fat: 4g
- Cholesterol: 15mg
- Sodium: 62mg
- Carbohydrates: 6g
- Sugar: 6g
- Protein: 4g